Your cart is currently empty!
Category: Step-by-Step Guide
-
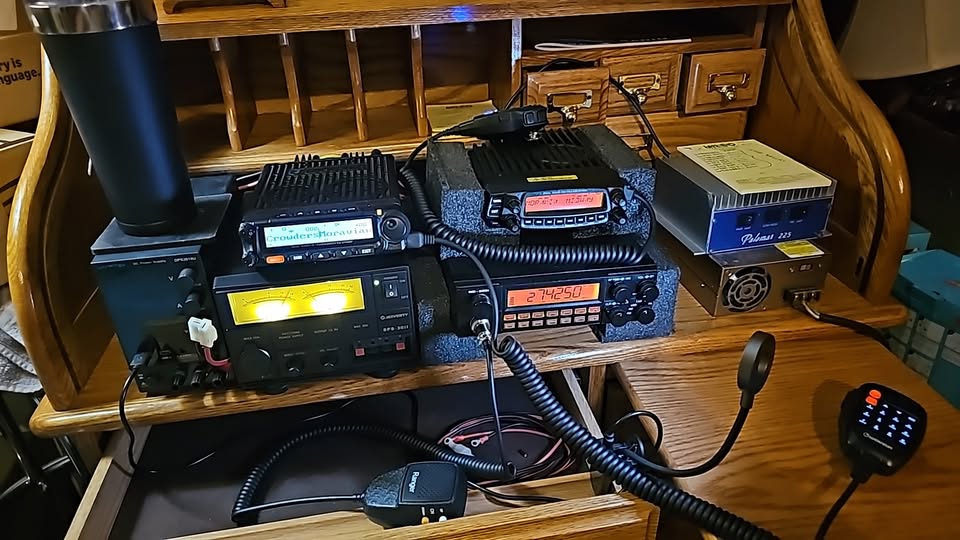
Grid-Out Communications: Why Your Radio Gear Becomes Critical When the Internet Fails
Table of Contents
Grid-out communications are more than just a concept — they’re a lifeline when power, internet, and cell networks fail. You’re a radio enthusiast, and you know how dependent we are on the grid: WiFi, cell towers, and internet infrastructure. When it falters, those familiar systems go silent. In a true grid-out scenario, your radio gear transforms from a hobby into essential communication.
Here at RadioOpBox, I’ve seen firsthand the difference between those who are prepared and those who aren’t. This guide explores why grid-out communications using HAM, GMRS, CB, and FRS radios are critical — and what you need to do to make them work for you.
Why Internet & Cell Networks Fail During Grid-Out

Grid‑Out Communications: How HAM, GMRS & More Save You Modern communications rely heavily on electricity, network backhaul, and infrastructure. When the grid takes a hit — due to extreme weather, cyberattacks, or cascading failures — you often lose:
- Power to your home and cell tower backup systems
- Internet backhaul and routing
- Cell/ISP infrastructure
In that moment, radios you control become your primary grid-out communications tool. If you’ve read our guide on Preparing Your HAM Station for Severe Weather, you know how fragile infrastructure can be.
Recent Grid-Out Scenarios in the U.S.
Even in modern America, the grid isn’t invincible. Here are a few examples from the past few years:
- Hurricane Ian (2022, Florida): Massive power outages left thousands without electricity or internet for days. HAM and GMRS operators provided critical communications for emergency crews and neighbors.
- Winter Storm Uri (2021, Texas): Rolling blackouts and downed cell networks made it difficult to coordinate relief efforts; local HAM networks were essential for reporting status and checking on isolated communities.
- Cybersecurity & Infrastructure Alerts (various states, 2023-2024): Power and network disruptions caused temporary outages in some regions, highlighting vulnerabilities in the grid and the importance of off-grid communications.
- California Wildfires (2020-2023): Evacuations and downed power lines left many without connectivity; amateur radio operators assisted with check-ins and emergency coordination.
These real-world events show why having a personal radio plan and gear ready isn’t just prepper hype — it’s practical, proven, and lifesaving.
Key Radio Options for Grid-Out Communications
Here’s a breakdown of the most reliable options for grid-out communications:
HAM (Amateur Radio)
- Requires a license but provides long-range, reliable communication when everything else fails.
- Operates independently of the commercial grid.
- Ideal for emergency and community coordination.
GMRS (General Mobile Radio Service)
- Higher-power handhelds and vehicle radios.
- Great for family and neighborhood grid-out communications when phones go dark.
CB (Citizens Band Radio)
- License-free in many cases.
- Effective for local communication during emergencies.
FRS (Family Radio Service)
- Low-power, short-range radios.
- Perfect for household or property coordination when the grid is down.
Satellite / Off-Grid Tools
- Optional higher-cost, higher-complexity solution for long-range communications.
Why HAM Comes First (Trust & Flexibility)
When preparing for grid-out communications, HAM radio should be your priority:
- Long-distance reach: Communicate beyond your neighborhood with a proper antenna.
- Independent infrastructure: Can run on batteries, solar, or generator power.
- Community & expertise: HAM operators support emergency networks like ARES and RACES, providing real-world emergency experience.
For more, see our article: HAM vs GMRS: Which Should You Prioritize?
GMRS, CB & “Short-Range” Backup Systems
Practical backups complement your grid-out communications plan:
- GMRS: Vehicle and neighborhood communication, several miles range. Example: TIDRADIO TD-H3
- CB: Simple, reliable, license-light option. Example: Amazon CB Radios
- FRS: Short-range, family or property communication. Example: Amazon FRS Radios
“If your reliable comms plan involves slightly longer ranges, say 0–10 miles… then maybe, just maybe, CB will work for you…”
Practical Steps to Prepare Your Grid-Out Communications Plan
- Get your license — At minimum, HAM Technician; consider GMRS too.
- Select your gear — Transceiver, antenna, and power backup.
- Ensure power backup — Batteries, solar, or generator power are essential.
- Define communication protocols — Set frequencies, channels, and check-in schedules.
- Train and practice — Participate in nets, drills, and test your equipment and power backups.
- Coordinate with your community — Share antennas, power solutions, and communication plans.
Example Scenario: Internet Down
Imagine a storm knocks out power, cell towers fail, and the internet is dark:
- Fire up your HAM transceiver, check local nets, and send status: “All clear, power out, need assistance.”
- Use GMRS or CB to check on neighbors: “I’m good, you okay?”
- Use FRS for family coordination: “Go to safe location, rotate power supplies.”
- Keep radios powered with batteries, solar, or generator.
- Use paper contact lists and pre-defined meeting points if digital tools fail completely.
Affiliate-Recommended Gear
Ready to set up your grid-out communications plan? These are trusted options:
- TIDRADIO TD-H3 (8-band HAM/GMRS)
- Baofeng UV-5R Dual-Band HAM
- Baofeng UV-5RM Plus
- TIDRADIO TD-H8 3rd-Gen
- BridgeCom BDR-4500 Repeater
- BridgeCom 150 W UHF Compact Duplexer
- Amazon GMRS Radios
- Amazon HAM Accessories
Why This Matters for RadioOpBox Readers
You’re invested in radios, frequencies, and prepping. A grid-out communications plan isn’t far-fetched — it’s where your knowledge and gear pay off. Use what you have, build what’s missing, coordinate with your community — that’s how you stay connected when the internet fails.
Conclusion
A grid-down scenario doesn’t have to leave you powerless. HAM, GMRS, CB, and FRS radios, combined with proper training, power backup, and a communication plan, let you maintain connectivity even when the internet and cell networks fail. Start small — even a single handheld radio can make a difference. Expand your setup, practice, and coordinate with your community for maximum preparedness.
Takeaway: Preparing now ensures you’re not scrambling in a blackout. Radios aren’t just hobbies — they’re your lifeline.
Affiliate Disclosure
Some of the links in this post are affiliate links. If you purchase through them, we may earn a small commission at no additional cost to you. This helps support RadioOpBox and allows us to keep producing high-quality guides. We only link to products we personally use or trust.
Summary & Call to Action
When the internet goes dark, cell coverage drops, or the power grid lags — the radio operator remains.
Action list:
- Get your HAM/GMRS license.
- Audit current comms gear: what works, what’s missing?
- Build backup power for your radios.
- Join a local net, coordinate with your community, run drills.
- Share this article with your prepping/ham group.
Photo credits go to Norman Smith, normal thanks for the amazing photo!
Thanks for being part of RadioOpBox. Stay ready. Stay on-frequency. Stay ahead.
-
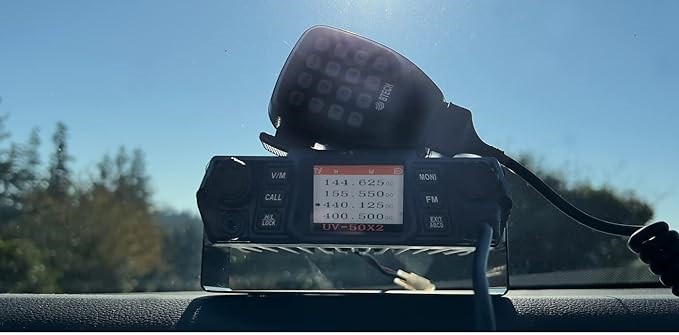
Mobile HAM Radio Setup: How to Install a HAM Radio in Your Vehicle
Table of Contents
If you’re ready to take your HAM radio hobby mobile, this mobile HAM radio setup guide will show you exactly how to install, wire, and optimize a HAM radio in your vehicle. Whether you’re commuting, off-roading, or supporting emergency communications, a properly installed mobile rig ensures reliability, maximum range, and clear communication wherever you go.
In this guide, you’ll learn about the essential equipment, step-by-step installation, safety practices, and the best mobile radios for beginners and advanced operators alike.
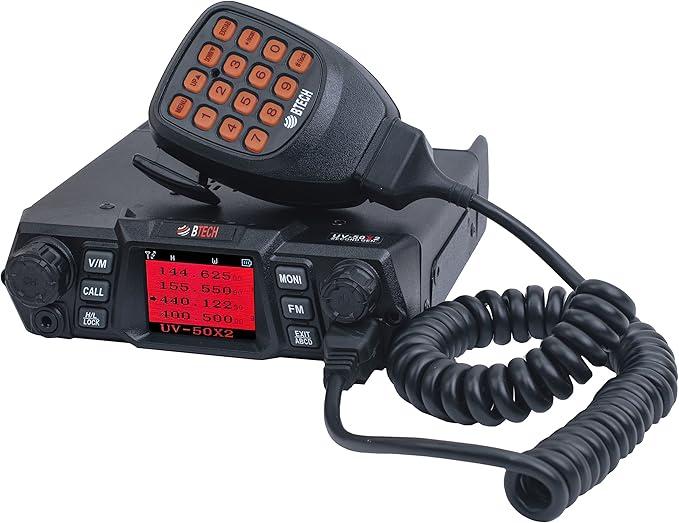
Mobile HAM Radio Setup
Why Set Up a Mobile HAM Radio?
A mobile HAM radio setup provides stronger power output (typically 25–50 watts or more), improved signal quality, and greater range than handheld units. For operators who travel, camp, or work outdoors, a vehicle setup offers unmatched communication reach.
You can even pair your system with GMRS for versatile coverage — ideal for family convoys, off-road adventures, or emergency communications.
👉 Read more: HAM vs GMRS Radio Guide
Essential Equipment for Your Mobile Setup
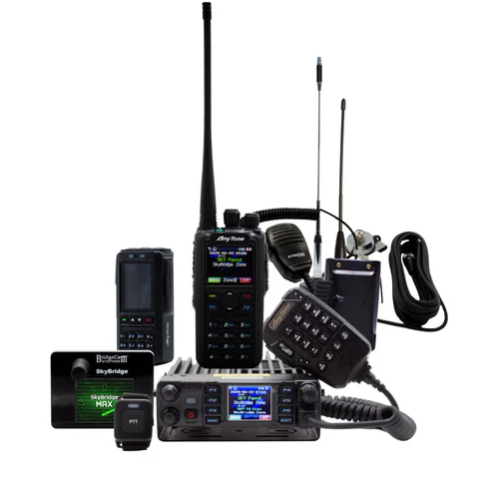
Before beginning your mobile HAM radio setup, gather the right gear:
1. Mobile HAM Radio Unit
Popular choices include:
- BTECH UV-50X2 – Dual-band, reliable, and perfect for mobile installs.
- BridgeCom AnyTone AT-D578UVIII Plus – Feature-rich DMR mobile radio with GPS and APRS.
These radios provide excellent power output and signal clarity, making them ideal for mobile operation.
2. Antenna & Mount
Use a high-quality NMO-mount antenna, such as the Nagoya UT-72G Magnetic Mount Antenna.
Proper placement on your vehicle’s roof or trunk maximizes range and minimizes interference.
👉 Related: How to Tune and Test Your Radio Antenna3. Power Source & Cabling
- Wire directly to your vehicle battery for clean power.
- Always use fused cables; avoid cigarette lighter plugs for permanent setups.
4. Microphone & Mounting Hardware
- Mount your radio securely under the dash or seat.
- Keep your microphone within easy reach for safe operation.
5. Optional Accessories
- Tidradio Bluetooth Programmer – Program your frequencies quickly and easily via smartphone.
- External speakers or headsets can improve audio clarity in noisy vehicles.
Installation Steps
Follow these steps for a safe, reliable mobile HAM radio setup:
- Pick Your Mounting Spot
Choose an accessible location that doesn’t interfere with vehicle controls or vents. - Install the Antenna
Ensure a solid ground plane and a clean surface before mounting. - Run Power Cables
Route cables through existing firewall grommets. Connect red to battery positive, black to ground. - Connect Microphone & Accessories
Attach your mic, external speaker, and programming cable before securing the radio. - Test Your Setup
Power on the radio and check SWR (standing wave ratio). A reading under 1.5:1 indicates optimal performance.
👉 Also check: Top HAM & GMRS Accessories from BTECH
Safety & Best Practices
- Never transmit without an antenna connected.
- Always use fuses on both power leads.
- Keep coax and power wires separated to avoid interference.
- Follow local regulations for mobile transceiver operation.
If you’re new to frequency management, check:
👉 How to Understand the HAM Radio Band Plan
Top Recommended Mobile Radios
Brand Model Power Notes BTECH UV-50X2 50W Dual-band, cross-band repeat BridgeCom Systems AnyTone AT-D578UVIII Plus 50W DMR + analog, GPS, APRS Tidradio TD-H8 Handheld 10W Ideal for hybrid setups BTECH Mini UV-25X4 25W Compact quad-band mobile radio
Final Thoughts
A mobile HAM radio setup in your vehicle ensures you stay connected, prepared, and part of the radio community no matter where you go. Use quality components, follow safe wiring practices, and double-check your antenna setup for the best performance.
Once complete, your vehicle becomes a reliable mobile communication hub ready for road trips, emergency preparedness, or everyday use.
Affiliate Disclosure
Some links in this post are affiliate links. Radio Op Box may earn a small commission if you purchase through them — at no extra cost to you. We only recommend trusted partners such as BTECH, BridgeCom Systems, Tidradio, and Amazon.
✅ Internal Links
How to Tune and Test Your Radio Antenna
-
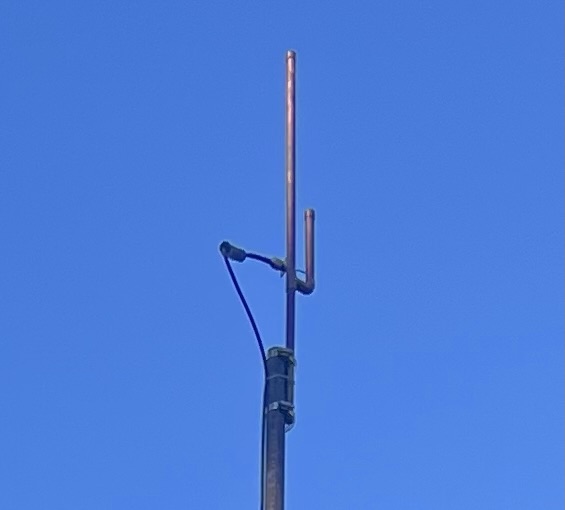
How to Build a Copper J-Pole Antenna for HAM and GMRS Radio (DIY Step-by-Step Guide)
Table of Contents
If you’ve ever felt the desire to construct your antenna yourself, only to be undecided on how to proceed, then you need to build a copper j-pole antenna and we think this project is for you. This is both cost-effective and requires little to no special equipment.
The first antenna I made was a J-pole, and I didn’t have an SWR meter for that project either. I just made my measurements, assembled the thing, plugged it in, and it worked wonderfully. This is, of course, the beauty of that design.
At RadioOpBox.com, we enjoy radio projects that can be completed by anyone, regardless of their level of radio knowledge.
???? What You’ll Need
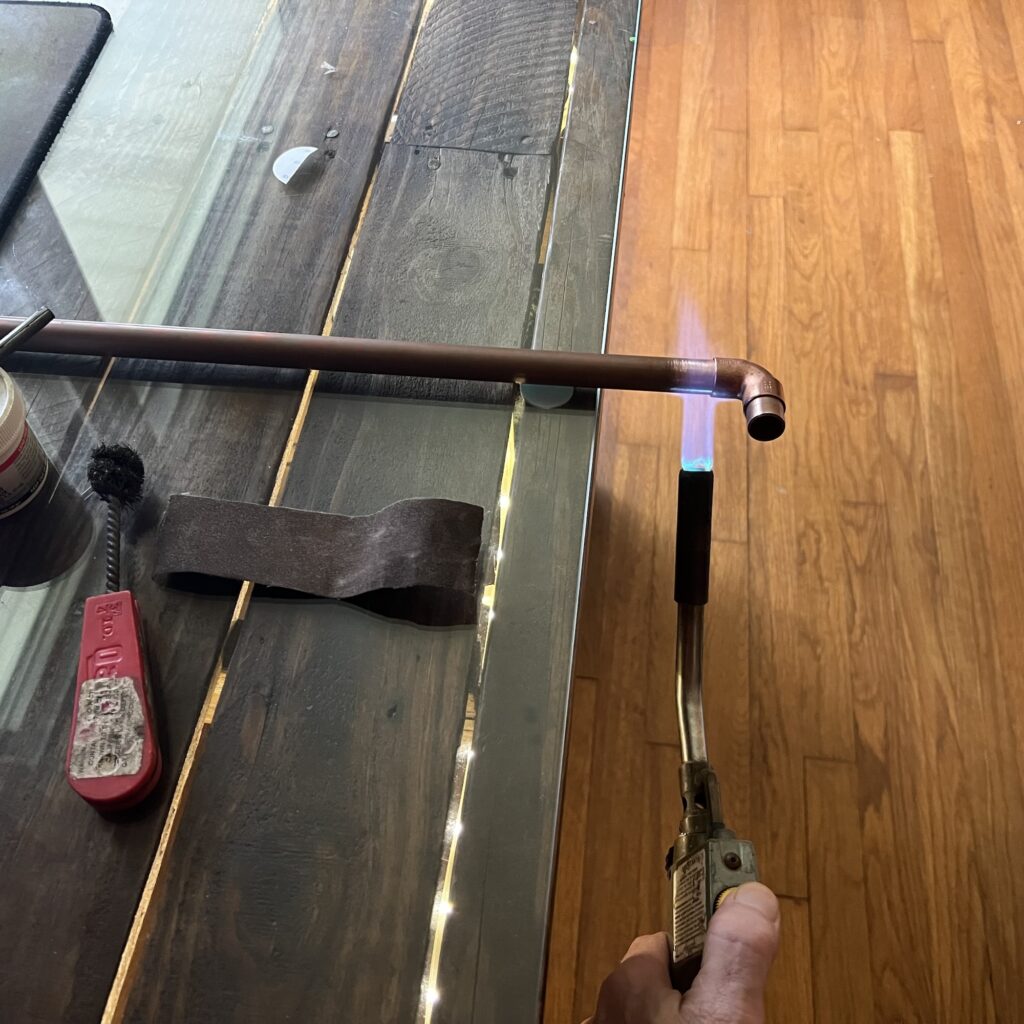
Everything that you will need to build a copper j-pole antenna, you can purchase either at a hardware store or through the internet.
Materials:
- 10 ft of ½ inch copper pipe
- Two ½-inch copper T-fittings
- One ½ inch copper end cap
- Coax connector (SO-239 or N-type)
- Stainless steel hose clamps
- Solder or brazing torch
- Measuring tape and hacksaw
Recommended accessories:
???? Step 1: Understanding the J-Pole
The J-pole antenna has a half-wave radiator and a quarter-wave matching stub. This simplifies the antenna construction process because it doesn’t require a ground plane, only accurate measurements and adequate solder joints.
For 2-meter HAM frequencies (~146 MHz):
Long radiator: ~58 inches
SHORT STUB: ~19 INCH
For GMRS (462–467 MHz) operation, reduce each dimension by one-third., reduce each dimension to about one-third.
??? **Step 2: Cut and Assemble**
- One copper pipe, cut to 58 inches.
- Trim another to 19 inches.
- Join them using a T-fitting at the bottom.
- Cap the top of the longer pipe.
- Leave approximately ¾ inch space between the two pipes.
Dry fit first, then solder when satisfied with the design.
???? Step 3: Connect the Feedpoint
Connect your coaxial cable feed line approximately 2½ inches from the T-joint:
- Center conductor → longer radiator
- Shield → shorter stub
Initially, you can start using hose clamps, then solder it permanently once it’s functioning.
# Step 4: Real-World Setup
I didn’t use any meters or analyzers, I just hooked it up to my radio, erected a mast, and keyered up. The difference was clear immediately. The signal from my local repeater came in stronger, and I was receiving clear reports from my contacts several miles away.
The beauty of this design is that it is forgiving, simple, and can still produce wonderful results without using actual measurements.
???? Step 5: Mounting
Try to install your antenna as high as possible, preferably 15 to 20 feet from the ground. An mast made from PVC or fiberglass will be your best option.
If it’s a matter of going outside, it’s important to seal the joints and ground the coax.
???? What to Expect
A properly constructed copper J-pole can provide you with:
- Gain: ~3 dBi
- VSWR: Preferably low enough to ensure reliability
- Range: 15 to 30 miles line-of-sight (dependent upon terrain and radio
Pair it with a good handheld like the
Anytone AT-D878UVII+
and will notice a marked improvement in clarity and reach.
???? Related Posts
- How to Tune and Test Your Radio Antenna
- LMR-400 vs RG8X Coax Guide
- Top HAM & GMRS Accessories from BTECH
# Final Thoughts
One of the most satisfying amateur radio projects to undertake yourself is to build a copper J-Pole antenna of your own. It’s extremely low-cost, quick, and will provide superior results without having to use any additional electronics or analyzers.
At RadioOpBox, we share how-to’s that range from real-world experience, the sort of thing that you can really build, not just read.
If this guide has assisted you, support us by visiting our affiliates:
Always keep exploring, experimenting, and 73!
– The RadioOpBox Team
Written by the RadioOpBox Team — a group of licensed operators and radio enthusiasts, sharing real world projects, tutorials, and reviews since 2025.
Disclosure
As an Amazon Associate and BTECH affiliate, RadioOpBox.com may earn commissions from qualifying purchases. These small commissions help us keep creating free, hands-on guides for radio enthusiasts. Thanks for your support!
-
Frequency Programming for Radios: HAM & GMRS Step-by-Step Guide
Table of Contents
Beginner’s Guide to Frequency Programming for Radios (HAM & GMRS)
Learning radio frequency programming for HAM and GMRS radios is a top priority for new operators. Proper programming provides clear communication, avoids interference, and makes your radios function efficiently. This tutorial provides detailed instruction from manual programming to utilizing CHIRP software, with recommended accessories to ease the process.
Whether you’re a hobbyist or just starting your radio setup, this guide will walk you through step-by-step instructions, plus pro tips to avoid common mistakes.
What is Frequency Programming?

FCC Band Plan Frequency programming is the process of setting channels and frequencies on your radio. It determines how your radio communicates and ensures you transmit on the correct legal frequencies. Both HAM radios and GMRS radios require proper frequency setup, though GMRS requires an FCC license in the United States.
There are two main methods:
- Manual Programming: Enter frequencies directly using your radio’s keypad.
- Computer Programming: Use software like CHIRP with a USB programming cable to program multiple channels efficiently.
Pro Tip: Using a programming cable with CHIRP is much faster than manual entry, especially if you plan to program multiple radios.
Check compatible programming cables on Amazon
Step-by-Step Frequency Programming for Radios
1. Choose the Correct Frequency Range
Make sure your radio supports the bands you want to use. HAM operators commonly use VHF (144–148 MHz) and UHF (420–450 MHz), while GMRS users operate between 462–467 MHz. Always confirm your frequency is legal in your area.
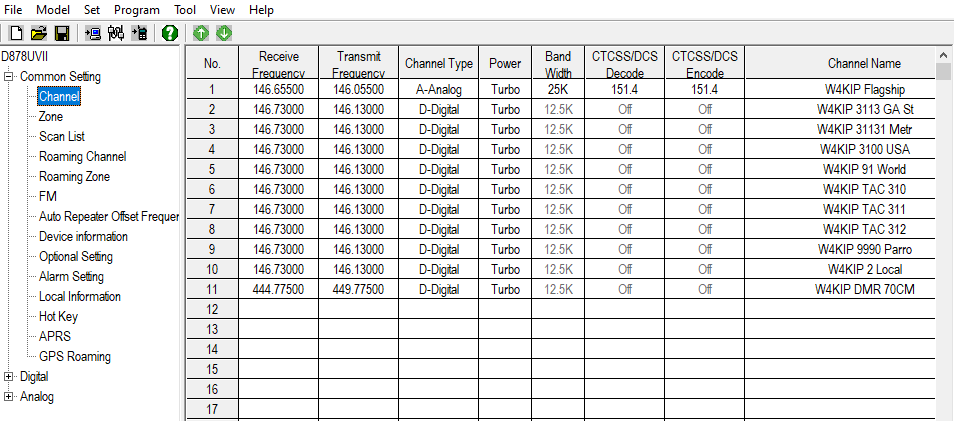
2. Select or Create a Channel
Decide which channel to program and name it for easy recognition (e.g., “Local Net” or “Repeater 1”). This helps avoid confusion when you have multiple channels programmed.
3. Enter the Frequency
Manual: Use the keypad to input the frequency directly.
CHIRP Software: Open CHIRP → Download from Radio → Edit channels → Upload to Radio. CHIRP allows you to quickly rename channels, set tones, and backup your frequency list.
4. Set Privacy Codes (Optional)
Many radios allow you to set CTCSS or DCS codes to reduce interference from other nearby users. If you’re communicating in a crowded area, this is highly recommended.
5. Save and Test Your Settings
Always transmit and receive after programming to confirm clear communication. Testing ensures your radio is working correctly and that all channels are properly programmed.
Recommended Radios for Beginners
For beginners learning frequency programming, we recommend:
- AnyTone 878UVII Plus – Compatible with CHIRP, reliable for HAM and GMRS, and beginner-friendly.
- Other HAM & GMRS radios – Browse our full selection of radios for all experience levels.
Recommended Accessories for Programming
- USB Programming Cable – Essential for CHIRP software.
- CHIRP Software (Free) – Download CHIRP here.
- Battery Backup – Prevent data loss during power outages.
- Label Maker or Logbook – Keep track of programmed channels and tones.
Explore all two-way radio accessories
Pro Tips for Beginners
- Double-check your frequencies to ensure legality.
- Keep a written log of channels and tone settings.
- Start with a few basic channels before programming dozens.
- Use CHIRP’s “Export” feature to backup your channel list.
- Label your radios clearly for each frequency set.
Comparison: Manual vs CHIRP Programming
Method Pros Cons Manual Programming No extra software required, good for a few channels Time-consuming, prone to errors, difficult for multiple radios CHIRP Programming Fast, allows backups, easy editing, ideal for multiple radios Requires cable and computer, small learning curve
Additional Resources & External Links
Conclusion
Mastering frequency programming for radios is a critical first step for any beginner radio operator. With tools like CHIRP, a USB programming cable, and beginner-friendly radios such as the AnyTone 878UVII Plus, you’ll save time, avoid mistakes, and enjoy clear communication. Start simple, follow these steps, and expand your channels as you gain confidence.
Check out our full selection of HAM and GMRS radios and accessories to get started today!
Amazon Affiliate Disclosure: As an Amazon Associate, RadioOpBox earns from qualifying purchases.
-
A Beginner’s Guide to Programming DMR Radios
Stepping into the world of Digital Mobile Radio (DMR) can be both exciting and daunting for newcomers. While the promise of crisp digital audio, robust features, and a worldwide network of repeaters is alluring, the process of programming a DMR radio often feels like learning a secret language. Unlike traditional analog radios, DMR devices require a more structured approach, centered around creating a digital file known as a codeplug.
This is a beginner’s guide to programming DMR radios and is designed to demystify that process, breaking down the key concepts and providing a clear, step-by-step path to getting your radio on the air. We’ll equip you with the foundational knowledge and practical steps needed to confidently program your first DMR handheld.
Understanding DMR: Key Concepts and Terminology
Before you even connect your radio to a computer, it’s crucial to grasp a few core DMR concepts.
- Codeplug – The “brain” of your radio: a file containing all frequencies, settings, and contacts.
- Channels – Saved frequencies, each paired with a Color Code (like CTCSS for digital) and Time Slot (TS1/TS2).
- Talk Groups (TG) – Pre-defined groups of users (e.g., Local, USA Nationwide, Worldwide).
- Contacts – A saved Talk Group or Radio ID inside your codeplug.
- Zones – Logical groups of channels you can organize (like “Home Repeaters” or “Travel”).
This structure—Contacts → Channels → Zones—is the foundation of DMR programming.
Step-by-Step Guide to Your First Codeplug
1. Gather Your Tools
You’ll need:
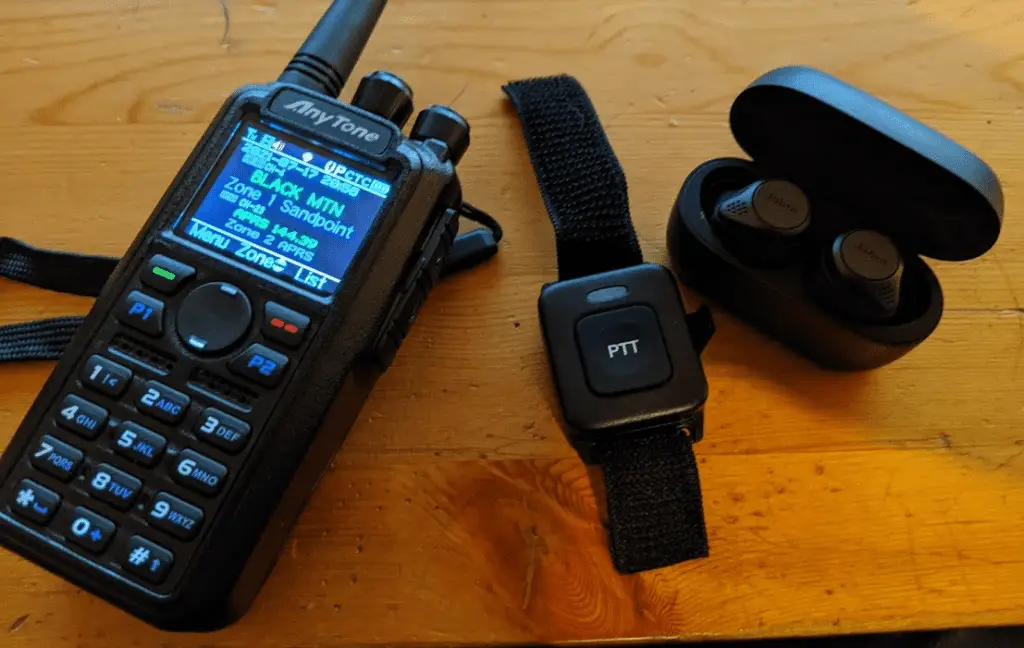
- A DMR radio like the AnyTone AT-D878UVII Plus (great for beginners).
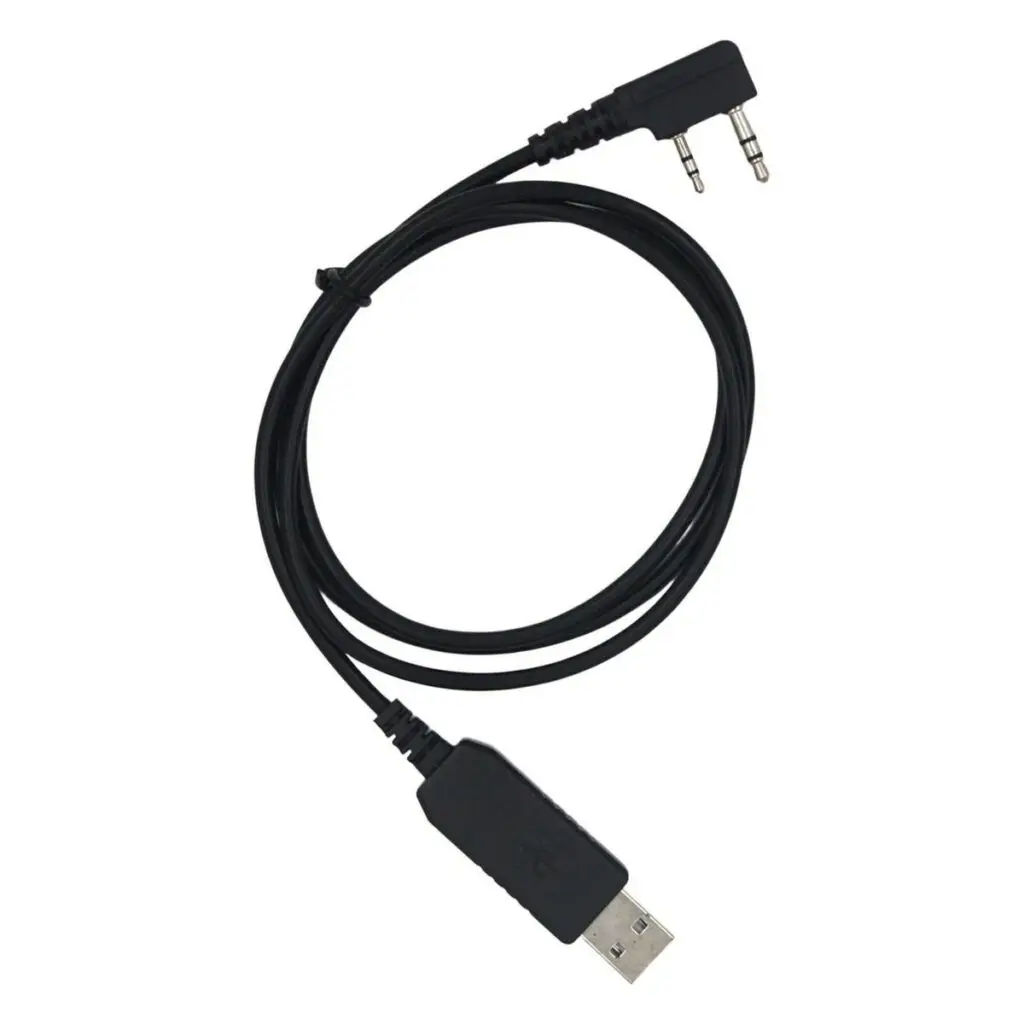
- A USB programming cable (often included, but you can get a reliable one here).
- The manufacturer’s programming software, usually free to download.
Pro Tip: A good starter radio is the Baofeng DM-1702 DMR—affordable, beginner-friendly, and widely supported.
2. Find a Local DMR Repeater
Visit RadioReference or your local club’s site to locate:
- Frequency
- Color Code
- Time Slots
- Talk Groups available
Write these details down.
3. Build Your Codeplug
Inside your software:
- Add Contacts (Talk Groups) – e.g., Worldwide 91, USA Nationwide 3100, Local 2.
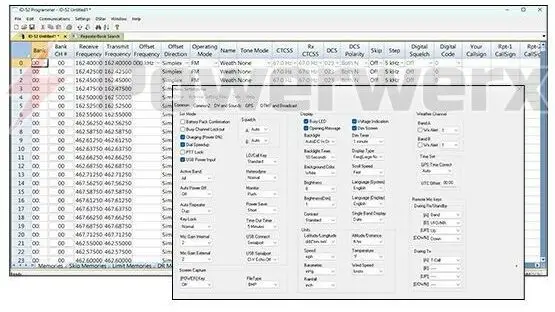
- Create Channels – Enter repeater frequency, Color Code, Time Slot, and assign a Talk Group.
- Organize into Zones – Example: “Local Repeaters” zone with your nearby channels.
4. Upload to Your Radio
- Connect your programming cable.
- Select Write to Radio in the software.
- Disconnect, switch zones, and test your first channel!
Tips for Success
- Start simple with one repeater and a few Talk Groups.
- Listen first before transmitting.
- Join a club or online group—the DMR community is welcoming and supportive.
Recommended Gear for Beginners
Starter DMR Handhelds:
Must-Have Accessories:
Keep Learning with RadioOpBox
If you’re exploring DMR and handheld gear, check out more helpful guides right here on RadioOpBox.com:
- How to Pair Your AnyTone 878UVII Plus Bluetooth PTT Button
Learn how to connect your AnyTone 878UVII Plus push-to-talk button for hands-free operation — perfect for mobile and field use. - Building Your First GMRS Base Station
Step-by-step setup for a strong and reliable GMRS home station.
Final Thoughts
Programming your first DMR radio is a rewarding milestone that opens the door to global connections and crystal-clear communications. While the learning curve is steeper than analog, the payoff is huge.
Start small, lean on the DMR community for guidance, and before long you’ll be confidently making worldwide contacts.
👉 Ready to get started? Grab a DMR radio here on Amazon and take your first step into the world of digital radio!
Amazon Affiliate Disclaimer
This site is a participant in the Amazon Services LLC Associates Program, an affiliate advertising program designed to provide a means for sites to earn advertising fees by advertising and linking to Amazon.com.
Amazon and the Amazon logo are trademarks of Amazon.com, Inc. or its affiliates.
We are not affiliated with, endorsed by, or sponsored by Amazon in any way.