Your cart is currently empty!
Tag: GMRS
-
Grid-Out Communications: Why Your Radio Gear Becomes Critical When the Internet Fails
Table of Contents
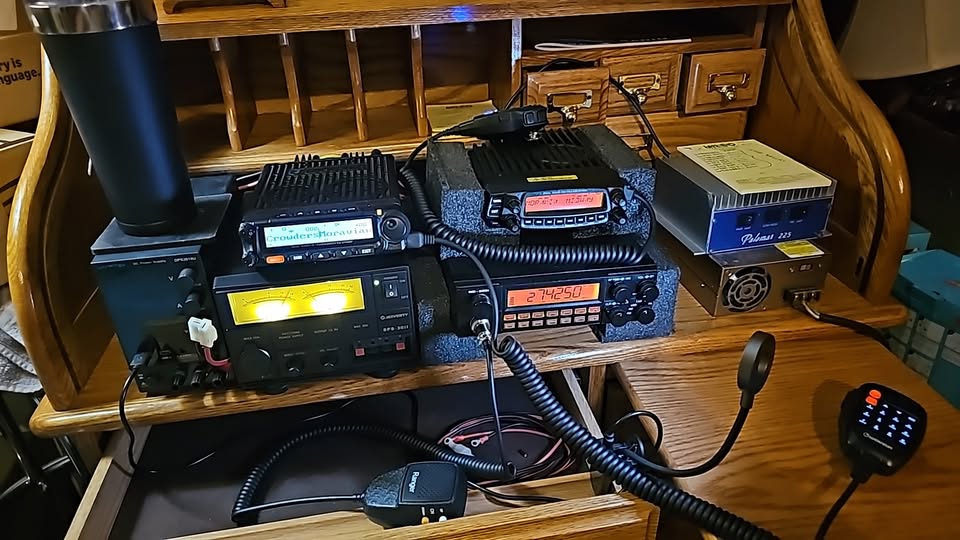
Grid-out communications are more than just a concept — they’re a lifeline when power, internet, and cell networks fail. You’re a radio enthusiast, and you know how dependent we are on the grid: WiFi, cell towers, and internet infrastructure. When it falters, those familiar systems go silent. In a true grid-out scenario, your radio gear transforms from a hobby into essential communication.
Here at RadioOpBox, I’ve seen firsthand the difference between those who are prepared and those who aren’t. This guide explores why grid-out communications using HAM, GMRS, CB, and FRS radios are critical — and what you need to do to make them work for you.
Why Internet & Cell Networks Fail During Grid-Out

Grid‑Out Communications: How HAM, GMRS & More Save You Modern communications rely heavily on electricity, network backhaul, and infrastructure. When the grid takes a hit — due to extreme weather, cyberattacks, or cascading failures — you often lose:
- Power to your home and cell tower backup systems
- Internet backhaul and routing
- Cell/ISP infrastructure
In that moment, radios you control become your primary grid-out communications tool. If you’ve read our guide on Preparing Your HAM Station for Severe Weather, you know how fragile infrastructure can be.
Recent Grid-Out Scenarios in the U.S.
Even in modern America, the grid isn’t invincible. Here are a few examples from the past few years:
- Hurricane Ian (2022, Florida): Massive power outages left thousands without electricity or internet for days. HAM and GMRS operators provided critical communications for emergency crews and neighbors.
- Winter Storm Uri (2021, Texas): Rolling blackouts and downed cell networks made it difficult to coordinate relief efforts; local HAM networks were essential for reporting status and checking on isolated communities.
- Cybersecurity & Infrastructure Alerts (various states, 2023-2024): Power and network disruptions caused temporary outages in some regions, highlighting vulnerabilities in the grid and the importance of off-grid communications.
- California Wildfires (2020-2023): Evacuations and downed power lines left many without connectivity; amateur radio operators assisted with check-ins and emergency coordination.
These real-world events show why having a personal radio plan and gear ready isn’t just prepper hype — it’s practical, proven, and lifesaving.
Key Radio Options for Grid-Out Communications
Here’s a breakdown of the most reliable options for grid-out communications:
HAM (Amateur Radio)
- Requires a license but provides long-range, reliable communication when everything else fails.
- Operates independently of the commercial grid.
- Ideal for emergency and community coordination.
GMRS (General Mobile Radio Service)
- Higher-power handhelds and vehicle radios.
- Great for family and neighborhood grid-out communications when phones go dark.
CB (Citizens Band Radio)
- License-free in many cases.
- Effective for local communication during emergencies.
FRS (Family Radio Service)
- Low-power, short-range radios.
- Perfect for household or property coordination when the grid is down.
Satellite / Off-Grid Tools
- Optional higher-cost, higher-complexity solution for long-range communications.
Why HAM Comes First (Trust & Flexibility)
When preparing for grid-out communications, HAM radio should be your priority:
- Long-distance reach: Communicate beyond your neighborhood with a proper antenna.
- Independent infrastructure: Can run on batteries, solar, or generator power.
- Community & expertise: HAM operators support emergency networks like ARES and RACES, providing real-world emergency experience.
For more, see our article: HAM vs GMRS: Which Should You Prioritize?
GMRS, CB & “Short-Range” Backup Systems
Practical backups complement your grid-out communications plan:
- GMRS: Vehicle and neighborhood communication, several miles range. Example: TIDRADIO TD-H3
- CB: Simple, reliable, license-light option. Example: Amazon CB Radios
- FRS: Short-range, family or property communication. Example: Amazon FRS Radios
“If your reliable comms plan involves slightly longer ranges, say 0–10 miles… then maybe, just maybe, CB will work for you…”
Practical Steps to Prepare Your Grid-Out Communications Plan
- Get your license — At minimum, HAM Technician; consider GMRS too.
- Select your gear — Transceiver, antenna, and power backup.
- Ensure power backup — Batteries, solar, or generator power are essential.
- Define communication protocols — Set frequencies, channels, and check-in schedules.
- Train and practice — Participate in nets, drills, and test your equipment and power backups.
- Coordinate with your community — Share antennas, power solutions, and communication plans.
Example Scenario: Internet Down
Imagine a storm knocks out power, cell towers fail, and the internet is dark:
- Fire up your HAM transceiver, check local nets, and send status: “All clear, power out, need assistance.”
- Use GMRS or CB to check on neighbors: “I’m good, you okay?”
- Use FRS for family coordination: “Go to safe location, rotate power supplies.”
- Keep radios powered with batteries, solar, or generator.
- Use paper contact lists and pre-defined meeting points if digital tools fail completely.
Affiliate-Recommended Gear
Ready to set up your grid-out communications plan? These are trusted options:
- TIDRADIO TD-H3 (8-band HAM/GMRS)
- Baofeng UV-5R Dual-Band HAM
- Baofeng UV-5RM Plus
- TIDRADIO TD-H8 3rd-Gen
- BridgeCom BDR-4500 Repeater
- BridgeCom 150 W UHF Compact Duplexer
- Amazon GMRS Radios
- Amazon HAM Accessories
Why This Matters for RadioOpBox Readers
You’re invested in radios, frequencies, and prepping. A grid-out communications plan isn’t far-fetched — it’s where your knowledge and gear pay off. Use what you have, build what’s missing, coordinate with your community — that’s how you stay connected when the internet fails.
Conclusion
A grid-down scenario doesn’t have to leave you powerless. HAM, GMRS, CB, and FRS radios, combined with proper training, power backup, and a communication plan, let you maintain connectivity even when the internet and cell networks fail. Start small — even a single handheld radio can make a difference. Expand your setup, practice, and coordinate with your community for maximum preparedness.
Takeaway: Preparing now ensures you’re not scrambling in a blackout. Radios aren’t just hobbies — they’re your lifeline.
Affiliate Disclosure
Some of the links in this post are affiliate links. If you purchase through them, we may earn a small commission at no additional cost to you. This helps support RadioOpBox and allows us to keep producing high-quality guides. We only link to products we personally use or trust.
Summary & Call to Action
When the internet goes dark, cell coverage drops, or the power grid lags — the radio operator remains.
Action list:
- Get your HAM/GMRS license.
- Audit current comms gear: what works, what’s missing?
- Build backup power for your radios.
- Join a local net, coordinate with your community, run drills.
- Share this article with your prepping/ham group.
Photo credits go to Norman Smith, normal thanks for the amazing photo!
Thanks for being part of RadioOpBox. Stay ready. Stay on-frequency. Stay ahead.
-
Mobile HAM Radio Setup: How to Install a HAM Radio in Your Vehicle
Table of Contents
If you’re ready to take your HAM radio hobby mobile, this mobile HAM radio setup guide will show you exactly how to install, wire, and optimize a HAM radio in your vehicle. Whether you’re commuting, off-roading, or supporting emergency communications, a properly installed mobile rig ensures reliability, maximum range, and clear communication wherever you go.
In this guide, you’ll learn about the essential equipment, step-by-step installation, safety practices, and the best mobile radios for beginners and advanced operators alike.
Mobile HAM Radio Setup
Why Set Up a Mobile HAM Radio?
A mobile HAM radio setup provides stronger power output (typically 25–50 watts or more), improved signal quality, and greater range than handheld units. For operators who travel, camp, or work outdoors, a vehicle setup offers unmatched communication reach.
You can even pair your system with GMRS for versatile coverage — ideal for family convoys, off-road adventures, or emergency communications.
👉 Read more: HAM vs GMRS Radio Guide
Essential Equipment for Your Mobile Setup
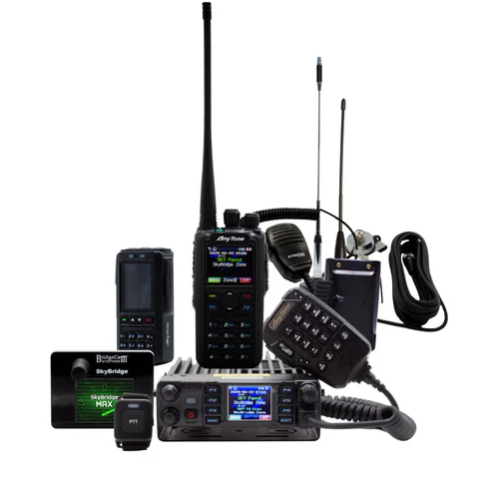
Before beginning your mobile HAM radio setup, gather the right gear:
1. Mobile HAM Radio Unit
Popular choices include:
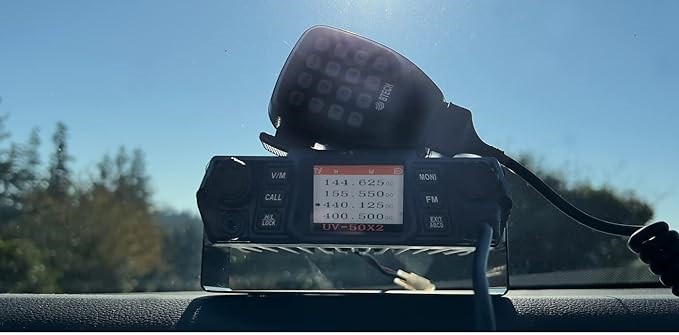
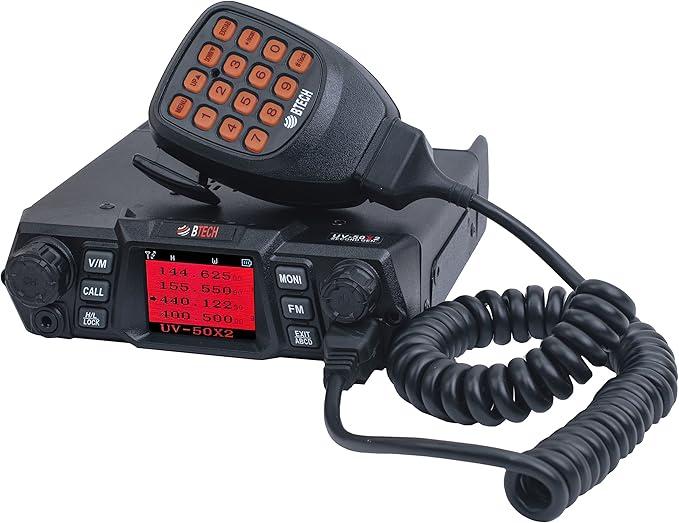
- BTECH UV-50X2 – Dual-band, reliable, and perfect for mobile installs.
- BridgeCom AnyTone AT-D578UVIII Plus – Feature-rich DMR mobile radio with GPS and APRS.
These radios provide excellent power output and signal clarity, making them ideal for mobile operation.
2. Antenna & Mount
Use a high-quality NMO-mount antenna, such as the Nagoya UT-72G Magnetic Mount Antenna.
Proper placement on your vehicle’s roof or trunk maximizes range and minimizes interference.
👉 Related: How to Tune and Test Your Radio Antenna3. Power Source & Cabling
- Wire directly to your vehicle battery for clean power.
- Always use fused cables; avoid cigarette lighter plugs for permanent setups.
4. Microphone & Mounting Hardware
- Mount your radio securely under the dash or seat.
- Keep your microphone within easy reach for safe operation.
5. Optional Accessories
- Tidradio Bluetooth Programmer – Program your frequencies quickly and easily via smartphone.
- External speakers or headsets can improve audio clarity in noisy vehicles.
Installation Steps
Follow these steps for a safe, reliable mobile HAM radio setup:
- Pick Your Mounting Spot
Choose an accessible location that doesn’t interfere with vehicle controls or vents. - Install the Antenna
Ensure a solid ground plane and a clean surface before mounting. - Run Power Cables
Route cables through existing firewall grommets. Connect red to battery positive, black to ground. - Connect Microphone & Accessories
Attach your mic, external speaker, and programming cable before securing the radio. - Test Your Setup
Power on the radio and check SWR (standing wave ratio). A reading under 1.5:1 indicates optimal performance.
👉 Also check: Top HAM & GMRS Accessories from BTECH
Safety & Best Practices
- Never transmit without an antenna connected.
- Always use fuses on both power leads.
- Keep coax and power wires separated to avoid interference.
- Follow local regulations for mobile transceiver operation.
If you’re new to frequency management, check:
👉 How to Understand the HAM Radio Band Plan
Top Recommended Mobile Radios
Brand Model Power Notes BTECH UV-50X2 50W Dual-band, cross-band repeat BridgeCom Systems AnyTone AT-D578UVIII Plus 50W DMR + analog, GPS, APRS Tidradio TD-H8 Handheld 10W Ideal for hybrid setups BTECH Mini UV-25X4 25W Compact quad-band mobile radio
Final Thoughts
A mobile HAM radio setup in your vehicle ensures you stay connected, prepared, and part of the radio community no matter where you go. Use quality components, follow safe wiring practices, and double-check your antenna setup for the best performance.
Once complete, your vehicle becomes a reliable mobile communication hub ready for road trips, emergency preparedness, or everyday use.
Affiliate Disclosure
Some links in this post are affiliate links. Radio Op Box may earn a small commission if you purchase through them — at no extra cost to you. We only recommend trusted partners such as BTECH, BridgeCom Systems, Tidradio, and Amazon.
✅ Internal Links
How to Tune and Test Your Radio Antenna
-
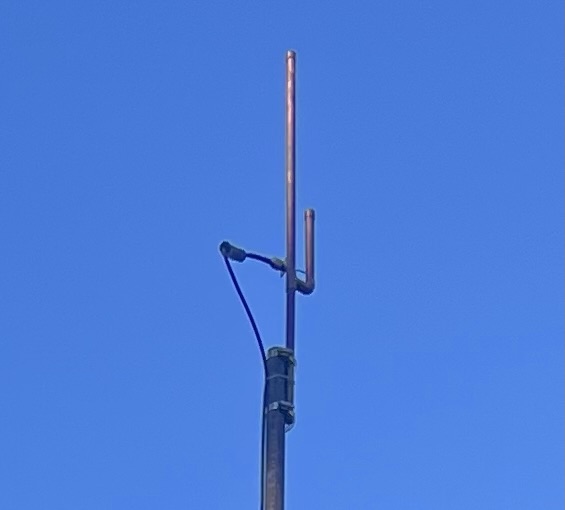
How to Build a Copper J-Pole Antenna for HAM and GMRS Radio (DIY Step-by-Step Guide)
Table of Contents
If you’ve ever felt the desire to construct your antenna yourself, only to be undecided on how to proceed, then you need to build a copper j-pole antenna and we think this project is for you. This is both cost-effective and requires little to no special equipment.
The first antenna I made was a J-pole, and I didn’t have an SWR meter for that project either. I just made my measurements, assembled the thing, plugged it in, and it worked wonderfully. This is, of course, the beauty of that design.
At RadioOpBox.com, we enjoy radio projects that can be completed by anyone, regardless of their level of radio knowledge.
???? What You’ll Need
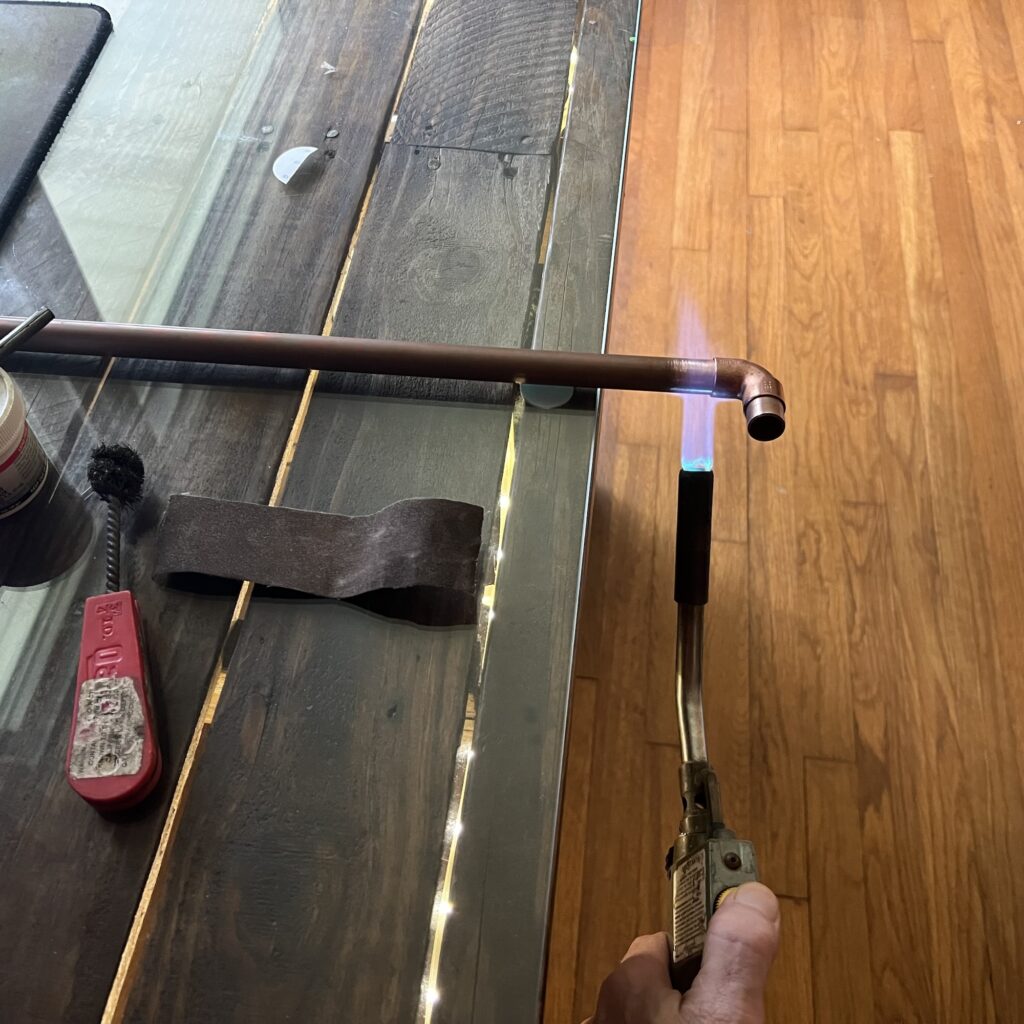
Everything that you will need to build a copper j-pole antenna, you can purchase either at a hardware store or through the internet.
Materials:
- 10 ft of ½ inch copper pipe
- Two ½-inch copper T-fittings
- One ½ inch copper end cap
- Coax connector (SO-239 or N-type)
- Stainless steel hose clamps
- Solder or brazing torch
- Measuring tape and hacksaw
Recommended accessories:
???? Step 1: Understanding the J-Pole
The J-pole antenna has a half-wave radiator and a quarter-wave matching stub. This simplifies the antenna construction process because it doesn’t require a ground plane, only accurate measurements and adequate solder joints.
For 2-meter HAM frequencies (~146 MHz):
Long radiator: ~58 inches
SHORT STUB: ~19 INCH
For GMRS (462–467 MHz) operation, reduce each dimension by one-third., reduce each dimension to about one-third.
??? **Step 2: Cut and Assemble**
- One copper pipe, cut to 58 inches.
- Trim another to 19 inches.
- Join them using a T-fitting at the bottom.
- Cap the top of the longer pipe.
- Leave approximately ¾ inch space between the two pipes.
Dry fit first, then solder when satisfied with the design.
???? Step 3: Connect the Feedpoint
Connect your coaxial cable feed line approximately 2½ inches from the T-joint:
- Center conductor → longer radiator
- Shield → shorter stub
Initially, you can start using hose clamps, then solder it permanently once it’s functioning.
# Step 4: Real-World Setup
I didn’t use any meters or analyzers, I just hooked it up to my radio, erected a mast, and keyered up. The difference was clear immediately. The signal from my local repeater came in stronger, and I was receiving clear reports from my contacts several miles away.
The beauty of this design is that it is forgiving, simple, and can still produce wonderful results without using actual measurements.
???? Step 5: Mounting
Try to install your antenna as high as possible, preferably 15 to 20 feet from the ground. An mast made from PVC or fiberglass will be your best option.
If it’s a matter of going outside, it’s important to seal the joints and ground the coax.
???? What to Expect
A properly constructed copper J-pole can provide you with:
- Gain: ~3 dBi
- VSWR: Preferably low enough to ensure reliability
- Range: 15 to 30 miles line-of-sight (dependent upon terrain and radio
Pair it with a good handheld like the
Anytone AT-D878UVII+
and will notice a marked improvement in clarity and reach.
???? Related Posts
- How to Tune and Test Your Radio Antenna
- LMR-400 vs RG8X Coax Guide
- Top HAM & GMRS Accessories from BTECH
# Final Thoughts
One of the most satisfying amateur radio projects to undertake yourself is to build a copper J-Pole antenna of your own. It’s extremely low-cost, quick, and will provide superior results without having to use any additional electronics or analyzers.
At RadioOpBox, we share how-to’s that range from real-world experience, the sort of thing that you can really build, not just read.
If this guide has assisted you, support us by visiting our affiliates:
Always keep exploring, experimenting, and 73!
– The RadioOpBox Team
Written by the RadioOpBox Team — a group of licensed operators and radio enthusiasts, sharing real world projects, tutorials, and reviews since 2025.
Disclosure
As an Amazon Associate and BTECH affiliate, RadioOpBox.com may earn commissions from qualifying purchases. These small commissions help us keep creating free, hands-on guides for radio enthusiasts. Thanks for your support!
-
Building Your First GMRS Base Station
Getting Started with GMRS
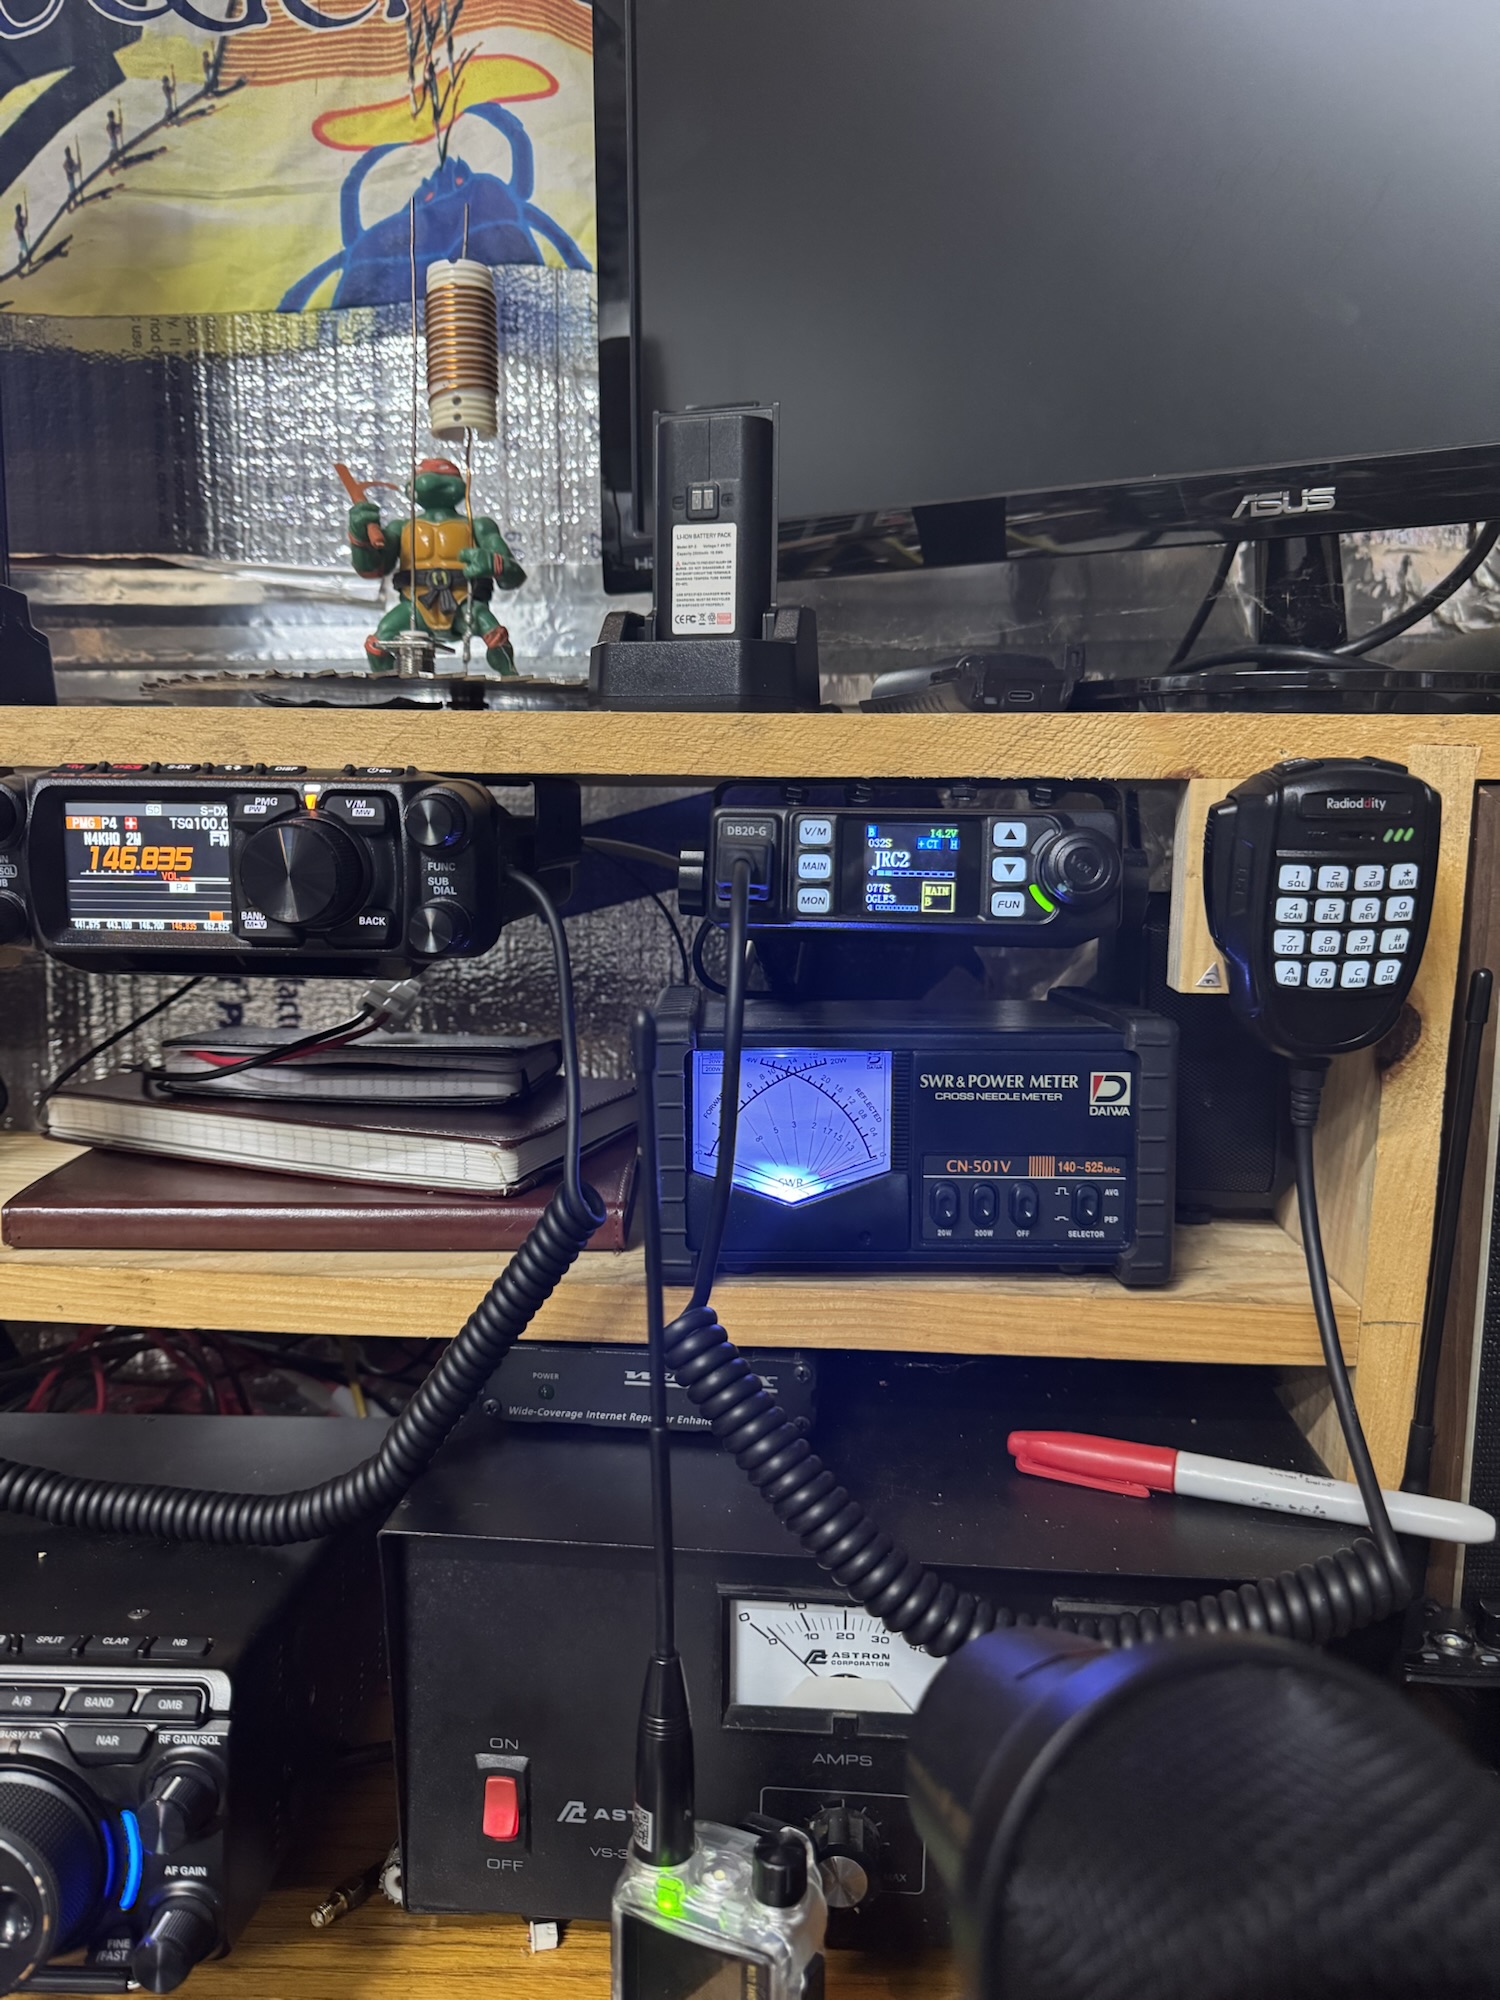
If you’ve wondered how to make a GMRS base station, you’re in the right location. Constructing your own base station is one of the finest ways to extend communication range, reliability, and clarity for local or emergency purposes. If you are new to GMRS or looking to upgrade from a handheld radio, this guide will show you exactly how to build your installation step by step.
A GMRS base station makes you stay in touch with your group, household, or emergency contacts even when cell networks fail — and the good news is that you can build one using some crucial components.
The Key Components of a GMRS Base Station
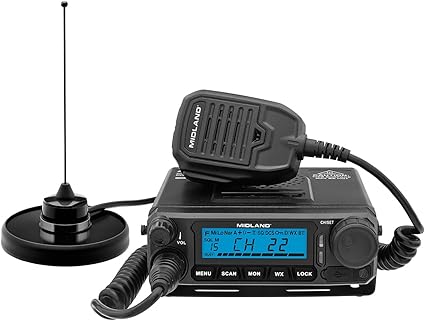
Building your own first GMRS base station is easier than you think once you have the right components.
1. GMRS Base Radio
Your radio is the hub of your station. It determines the power you will be able to transmit and what features you will be able to use (such as repeater access or channel scanning).
Radios We Recommend:
Midland MXT500 MicroMobile 50-Watt GMRS Radio – a high-powered, easy-to-use GMRS base radio perfect for beginners. BTECH GMRS-50X1 50-Watt GMRS Base Radio – advanced programming features, repeater support.
Tip: For even more flexibility, check out our Frequency Programming guide to GMRS and HAM Radios.
2. Antenna and Coax Cable
The antenna is the deal-breaker unit of your GMRS base station range. Putting your antenna up high (on your roof or pole) provides you with improved line-of-sight and greater reach.
Recommended Antennas:
Nagoya TB-320A Base Antenna for GMRS — very low cost, easy to install, and works very well for home setups.
Comet GP-9 Dual Band Base Antenna — great gain and life.
For the best performance, use low-loss coax cable like LMR-400 Coax Cable run from your antenna to your radio.
Related Reading: Best Accessories for Two-Way Radios
3. Power Supply
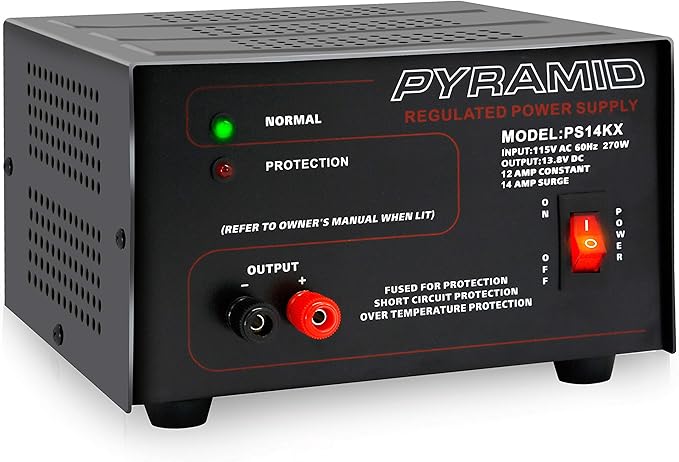
Most GMRS base radios use 12V DC power, which means you’ll need a reliable converter or power supply if you’re running it from your home outlet.
Recommended Power Supply:
Pyramid PS14KX 12V Power Supply — provides stable current for long operating sessions.
If you want a stronger setup which can survive non-outages, include a solar backup or battery system. We discuss this in detail in our Emergency Power Options for HAM Operators guide.
4. Mounting, Grounding & Safety
Don’t skip grounding — it’s essential for lightning safety and reducing interference. Ground both your radio and your antenna system properly.
Don’t omit grounding — it is required to keep you safe from lightning and to reduce interference. Ground both your radio and your antenna system properly.
For safety tips, see our guide on Lightning and Antenna Safety Tips.
How to Assemble Your GMRS Base Station
Here’s step by step how to assemble your GMRS base station:
Mount your antenna as high as it will go safely (roof, pole, or tower).
Connect your antenna to your radio with low-loss coax.
Connect your power source to your GMRS radio.
Tune your antenna with an SWR meter for optimal performance.
Do a range test to make sure your setup is transmitting cleanly.
Following assembly, your GMRS base station gives you sharp communication across several miles — perfect for community nets, prepping, or off-grid communications.
Pro Tips for Expanding Your Setup
Once you’ve got your base station operational, you can expand it with ease by adding:
Repeater Access: to boost your range of communication.
External Speaker: for improved indoor clarity.
Battery Backup: for continuous off-grid use.
Check out our article on Essential Two-Way Radio Accessories for Enhanced Communication additional tips on how to make your set-up better.
Final Thoughts
With what you’ve just read about how to build a GMRS base station, you’re now ready to have access to powerful, solid communications that beat handhelds every time. With the right radio, antenna, and power setup, you’ll have a station that keeps you in touch — whether it’s for everyday use, emergency preparedness, or communicating with your neighborhood.
Start constructing today and watch what a good-quality GMRS base station can achieve!
Amazon Affiliate Disclosure
I am an Amazon Associate and earn commissions from qualifying purchases. That means if you click on a product link and purchase something, we’ll receive a small commission at no extra cost to you. This helps support our content at RadioOpBox.com — thank you for the support!
-
Frequency Programming for Radios: HAM & GMRS Step-by-Step Guide
Table of Contents
Beginner’s Guide to Frequency Programming for Radios (HAM & GMRS)
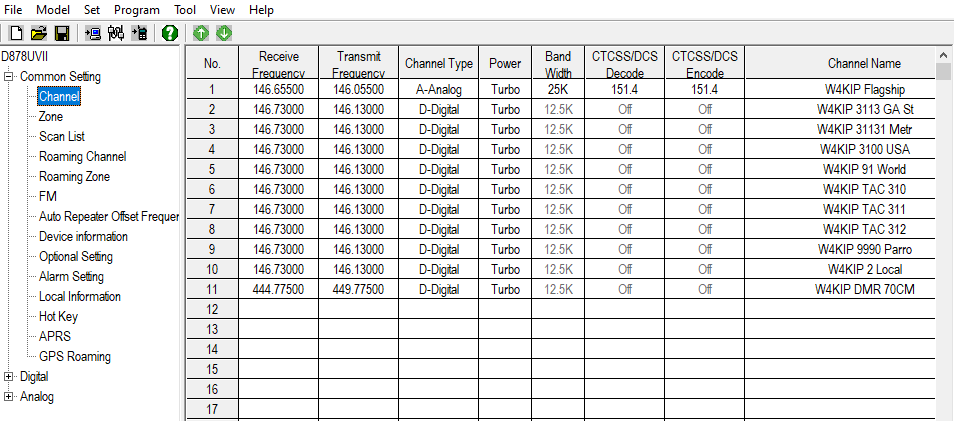
Learning radio frequency programming for HAM and GMRS radios is a top priority for new operators. Proper programming provides clear communication, avoids interference, and makes your radios function efficiently. This tutorial provides detailed instruction from manual programming to utilizing CHIRP software, with recommended accessories to ease the process.
Whether you’re a hobbyist or just starting your radio setup, this guide will walk you through step-by-step instructions, plus pro tips to avoid common mistakes.
What is Frequency Programming?

FCC Band Plan Frequency programming is the process of setting channels and frequencies on your radio. It determines how your radio communicates and ensures you transmit on the correct legal frequencies. Both HAM radios and GMRS radios require proper frequency setup, though GMRS requires an FCC license in the United States.
There are two main methods:
- Manual Programming: Enter frequencies directly using your radio’s keypad.
- Computer Programming: Use software like CHIRP with a USB programming cable to program multiple channels efficiently.
Pro Tip: Using a programming cable with CHIRP is much faster than manual entry, especially if you plan to program multiple radios.
Check compatible programming cables on Amazon
Step-by-Step Frequency Programming for Radios
1. Choose the Correct Frequency Range
Make sure your radio supports the bands you want to use. HAM operators commonly use VHF (144–148 MHz) and UHF (420–450 MHz), while GMRS users operate between 462–467 MHz. Always confirm your frequency is legal in your area.
2. Select or Create a Channel
Decide which channel to program and name it for easy recognition (e.g., “Local Net” or “Repeater 1”). This helps avoid confusion when you have multiple channels programmed.
3. Enter the Frequency
Manual: Use the keypad to input the frequency directly.
CHIRP Software: Open CHIRP → Download from Radio → Edit channels → Upload to Radio. CHIRP allows you to quickly rename channels, set tones, and backup your frequency list.
4. Set Privacy Codes (Optional)
Many radios allow you to set CTCSS or DCS codes to reduce interference from other nearby users. If you’re communicating in a crowded area, this is highly recommended.
5. Save and Test Your Settings
Always transmit and receive after programming to confirm clear communication. Testing ensures your radio is working correctly and that all channels are properly programmed.
Recommended Radios for Beginners
For beginners learning frequency programming, we recommend:
- AnyTone 878UVII Plus – Compatible with CHIRP, reliable for HAM and GMRS, and beginner-friendly.
- Other HAM & GMRS radios – Browse our full selection of radios for all experience levels.
Recommended Accessories for Programming
- USB Programming Cable – Essential for CHIRP software.
- CHIRP Software (Free) – Download CHIRP here.
- Battery Backup – Prevent data loss during power outages.
- Label Maker or Logbook – Keep track of programmed channels and tones.
Explore all two-way radio accessories
Pro Tips for Beginners
- Double-check your frequencies to ensure legality.
- Keep a written log of channels and tone settings.
- Start with a few basic channels before programming dozens.
- Use CHIRP’s “Export” feature to backup your channel list.
- Label your radios clearly for each frequency set.
Comparison: Manual vs CHIRP Programming
Method Pros Cons Manual Programming No extra software required, good for a few channels Time-consuming, prone to errors, difficult for multiple radios CHIRP Programming Fast, allows backups, easy editing, ideal for multiple radios Requires cable and computer, small learning curve
Additional Resources & External Links
Conclusion
Mastering frequency programming for radios is a critical first step for any beginner radio operator. With tools like CHIRP, a USB programming cable, and beginner-friendly radios such as the AnyTone 878UVII Plus, you’ll save time, avoid mistakes, and enjoy clear communication. Start simple, follow these steps, and expand your channels as you gain confidence.
Check out our full selection of HAM and GMRS radios and accessories to get started today!
Amazon Affiliate Disclosure: As an Amazon Associate, RadioOpBox earns from qualifying purchases.
-
Essential Two-Way Radio Accessories for Enhanced Communication
Two-way radios are the undisputed champions of reliable communication across a huge range of situations—from coordinating large events to maintaining safety on a construction site. While the radio itself is the heart of your setup, its true potential is unlocked with the right gear.
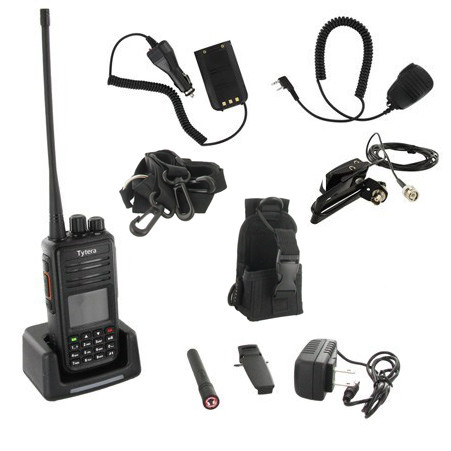
Just as a smartphone needs a case and charger, your two-way radio thrives when equipped with the right radio accessories. This guide explores the must-have add-ons to improve clarity, extend battery life, and protect your investment.
If you’re new to radio communication, you might also enjoy our Beginner’s Guide to HAM and GMRS Radios and our Two-Way Radio Safety Tips.
🎧 Must-Have Radio Accessories for Clearer Calls
The main goal of radio communication is simple: be heard and understood. Three accessories stand out as essential for achieving crystal-clear audio.
1. External Microphones & Speakers
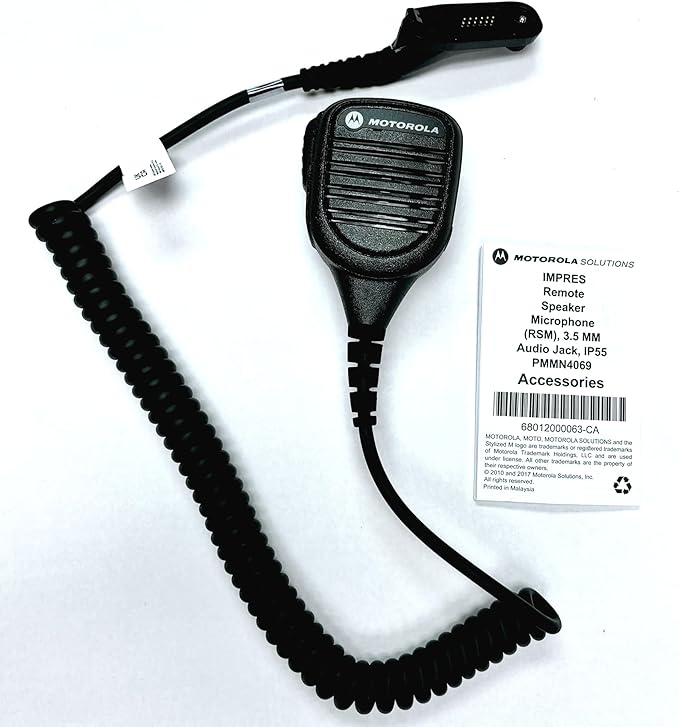
A high-quality external microphone and speaker are game changers in noisy environments like warehouses, concerts, or outdoor events. By positioning the mic closer to your mouth and the speaker nearer your ear, you drastically reduce background interference.
Many models feature noise-cancellation technology, ensuring your voice cuts through the noise.
Recommended: Motorola Speaker Mic on Amazon
2. Professional Headsets
For hands-free operation, a two-way radio headset is indispensable. Perfect for security personnel, event staff, or emergency teams, these keep your hands on task—not on your radio.
Choose from single-ear models for situational awareness or noise-isolating over-ear designs for loud work environments.
Recommended: Midland AVPH10 Shoulder Speaker Mic Headset
3. Upgraded Antennas
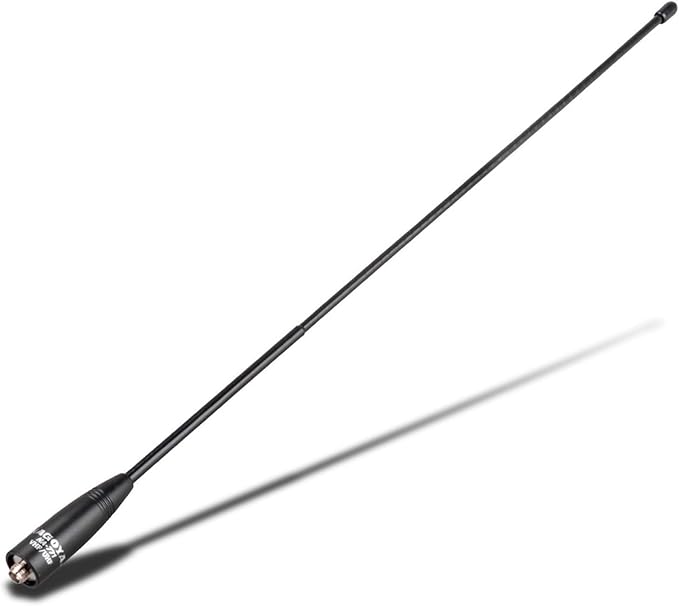
Don’t underestimate your antenna—it’s the key to range and clarity. Factory antennas are often general-purpose compromises. Upgrading to a high-gain antenna can dramatically extend your communication distance.
Alternatively, a flexible short antenna minimizes snagging, ideal for those carrying radios on belts or vests.
Recommended: Nagoya NA-771 Dual Band Antenna
🔋 Power & Protection for Your Communication Gear
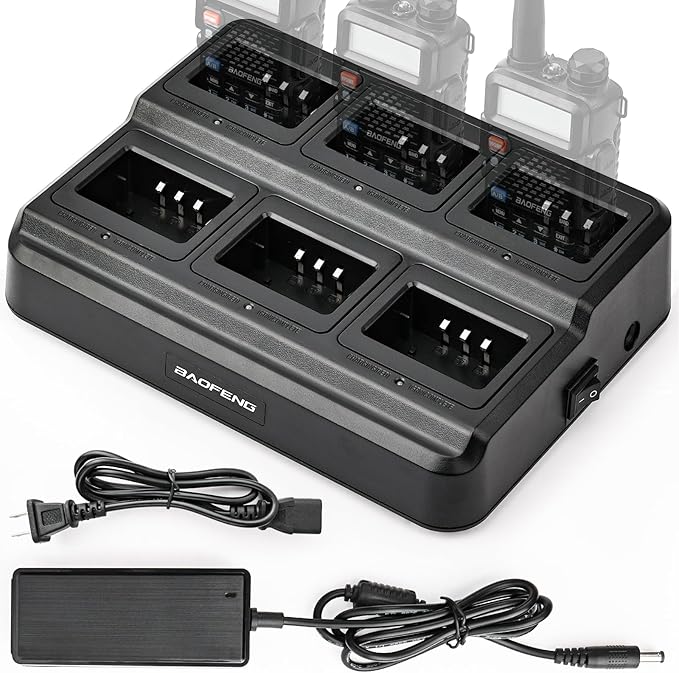
A dead radio is useless. Keeping consistent power is vital for uninterrupted operation.
Extra Batteries & Multi-Chargers
Investing in spare batteries ensures you’re never caught off guard. A high-capacity battery can double your radio’s uptime, while a multi-unit charger keeps multiple radios or batteries topped up.
Recommended: BAOFENG BL-5L Extended Battery
Recommended: BAOFENG 6-Way Multi Charger
Protective Cases & Holsters
Rugged environments demand rugged protection. A carrying case or bumper guard prevents damage from drops or impacts. Industries like construction and public safety benefit most from shock-absorbing radio cases.
Recommended: Universal Nylon Radio HolsterFor easy access, use a heavy-duty belt clip or shoulder mic holder. These make your radio secure and comfortable to wear during long shifts.
Check out our related guide on Preventing Water Damage to Your Antenna and SWR Meter.
Build a Reliable Communication Setup
By combining crystal-clear audio accessories, long-lasting power solutions, and robust protection, you elevate your two-way radio system from basic to professional-grade.
These simple investments lead to:
- Better clarity and communication range
- Improved productivity and safety
- Longer equipment lifespan
Whether for HAM, GMRS, or professional use, your upgraded setup will keep you connected when it matters most.
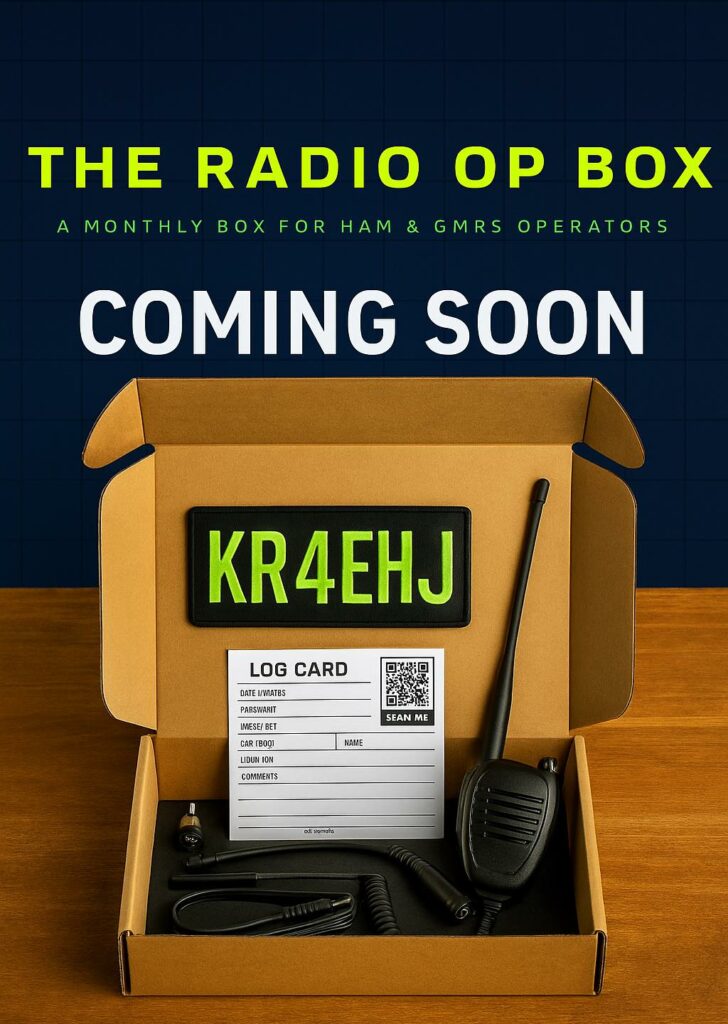
If you want to go a step further, explore our Radio Op Box monthly subscription—featuring curated gear and accessories for radio enthusiasts.
⚙️ Affiliate Disclosure
This article contains affiliate links to products on Amazon. As an Amazon Associate, we may earn a commission from qualifying purchases—at no extra cost to you. This helps support our site and allows us to continue providing helpful guides and reviews for radio operators everywhere.
-

Two-Way Radio Safety: Essential Best Practices Guide
In our hyper-connected world of smartphones and Wi-Fi, the humble two-way radio might seem like a relic of the past. However, for countless professionals in security, construction, event management, and outdoor recreation, these devices remain an indispensable and reliable tool for instant communication.
Yet, like any powerful tool, using a two-way radio comes with its own set of responsibilities and potential hazards. Prioritizing safety isn’t just about following rules; it’s about ensuring clear communication during critical moments and protecting both the user and their equipment. This guide will walk you through the essential best practices for two-way radio safety to ensure your operations are not only effective but, most importantly, secure.
Prioritizing Health and Environmental Safety
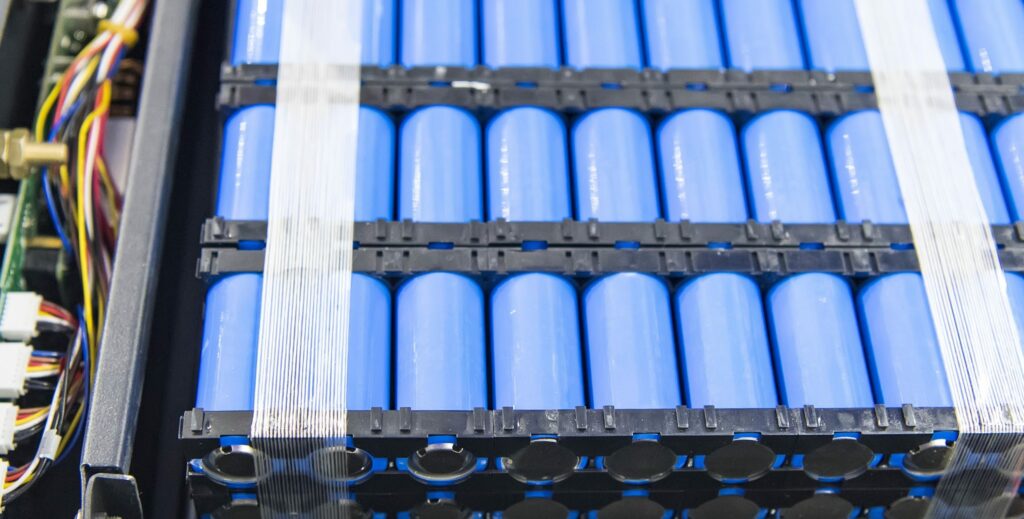
Lithium ion industrial high current batteries The most immediate aspect of two-way radio safety concerns your personal well-being and the environment you operate in. A primary consideration is the safe handling of batteries, particularly Lithium-Ion (Li-Ion) cells, which are common in modern radios.
Recommended Gear:
Always use manufacturer-approved chargers and batteries to prevent overheating, swelling, or, in extreme cases, combustion. Never leave a charging battery unattended for long periods, and store it in a cool, dry place away from metal objects like keys or coins that could cause a short circuit.
Furthermore, be mindful of your volume settings. Prolonged exposure to high-volume earpieces or speakers can lead to hearing damage, so keep the audio at a comfortable level.
Your physical surroundings also demand constant attention when using a radio. The golden rule is to never transmit in flammable or explosive environments — such as gas stations, chemical plants, or grain silos. A spark from the circuitry can ignite vapors. Always look for hazard signage.
⚠️ Pro Tip: Never use your radio during an electrical storm. Holding metal during lightning activity is risky. If you’re on a construction site or working at heights, secure your radio with a heavy-duty belt clip or lanyard to prevent drops that could injure someone below.
And finally — don’t forget situational awareness. Just like texting while driving, operating a radio can distract you. If you’re driving, navigating, or handling machinery, stop before using your radio. If you must talk while moving, use a hands-free mic or PTT earpiece to keep both hands free and your focus on the job.
Essential Best Practices for Secure Operations
Secure and effective communication is the entire purpose of a two-way radio — and that comes down to disciplined radio etiquette.
Begin each transmission by clearly identifying yourself and who you’re calling. For example:
“Unit 2 to Base, come in.”
Keep your messages short, clear, and direct. Always say “Over” when finished speaking and “Clear” when done with the conversation. This ensures clarity and prevents overlapping transmissions.
Channel & Privacy Management
Always use the correct channel for your task. Avoid clogging critical or emergency channels with general talk. If your team operates multiple channels, ensure everyone knows which is which — for instance:
- Channel 1: Operations
- Channel 2: Logistics
- Channel 9: Emergencies Only
You can also use privacy codes (CTCSS/DCS) to reduce interference from nearby users — though note these aren’t encryption.
Helpful Accessory: Baofeng UV-5R Dual Band Two-Way Radio — an affordable and versatile handheld great for teams or hobbyists.
Regular Equipment Checks and Maintenance
Before every shift or operation, perform a radio check with a colleague. Confirm your signal strength, audio clarity, and battery level. Inspect your radio, antenna, and cables for damage.
Maintenance Essentials:
A cracked antenna can compromise performance and even cause RF exposure issues. Make a habit of proper maintenance and storage, and your radio will always perform when you need it most.
Final Thoughts
Adopting these two-way radio safety practices isn’t about limiting communication — it’s about empowering it. When every operator follows clear, consistent safety habits, the entire team operates more efficiently and confidently.
Remember: safety and communication go hand in hand. The better prepared you are, the more reliable your two-way radio becomes as a lifeline — not just a tool.
⚠️ Amazon Affiliate Disclosure
Disclosure: As an Amazon Associate, I earn from qualifying purchases. This means if you click on an affiliate link (such as a radio, antenna, or accessory) and make a purchase, I may receive a small commission at no additional cost to you. This helps support RadioOpBox.com and allows me to continue providing helpful radio safety guides. Thank you for your support!
-
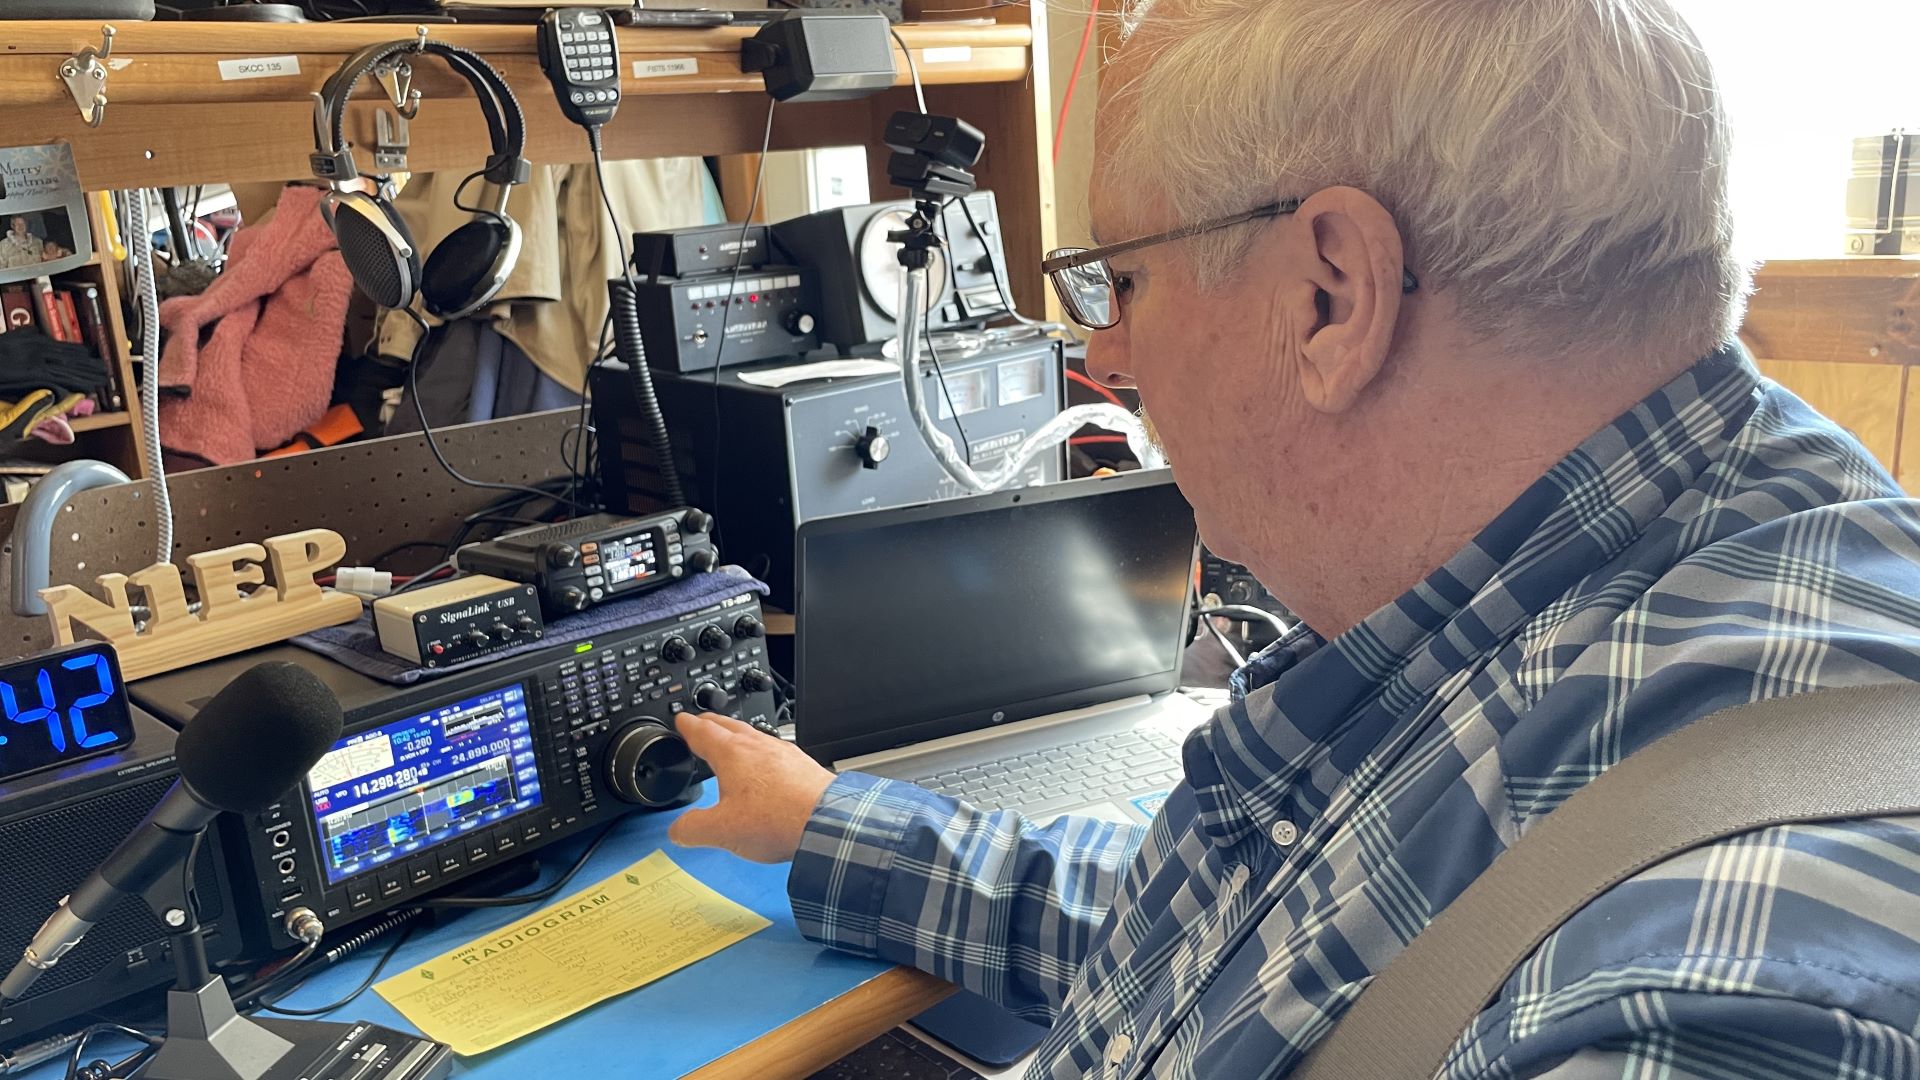
How to Stay Connected During a Government Shutdown: HAM & GMRS Radio Tips
A government shutdown can disrupt many services we rely on every day, from public offices to online resources. For HAM and GMRS radio enthusiasts, this is the perfect opportunity to focus on self-reliance, community communication, and improving your radio skills. Here’s a guide on what you can do while the government is shut down to stay connected and make the most of your hobby.
1. Practice Emergency Communication
HAM and GMRS radios are invaluable tools during emergencies. A government shutdown may affect disaster response services, making community communication more crucial than ever.
Test your handhelds (HTs) and mobile radios. Join local HAM nets or GMRS channels to practice traffic handling. Simulate emergency scenarios with friends or local clubs.
2. Upgrade Your Equipment
With offices and suppliers slowing down, it’s a good time to tune up your radios and accessories:
Clean and inspect antennas and coax cables. Upgrade your battery packs or power supplies. Explore digital modes like DMR or FT8 if your setup supports them.
3. Organize a Local Radio Drill
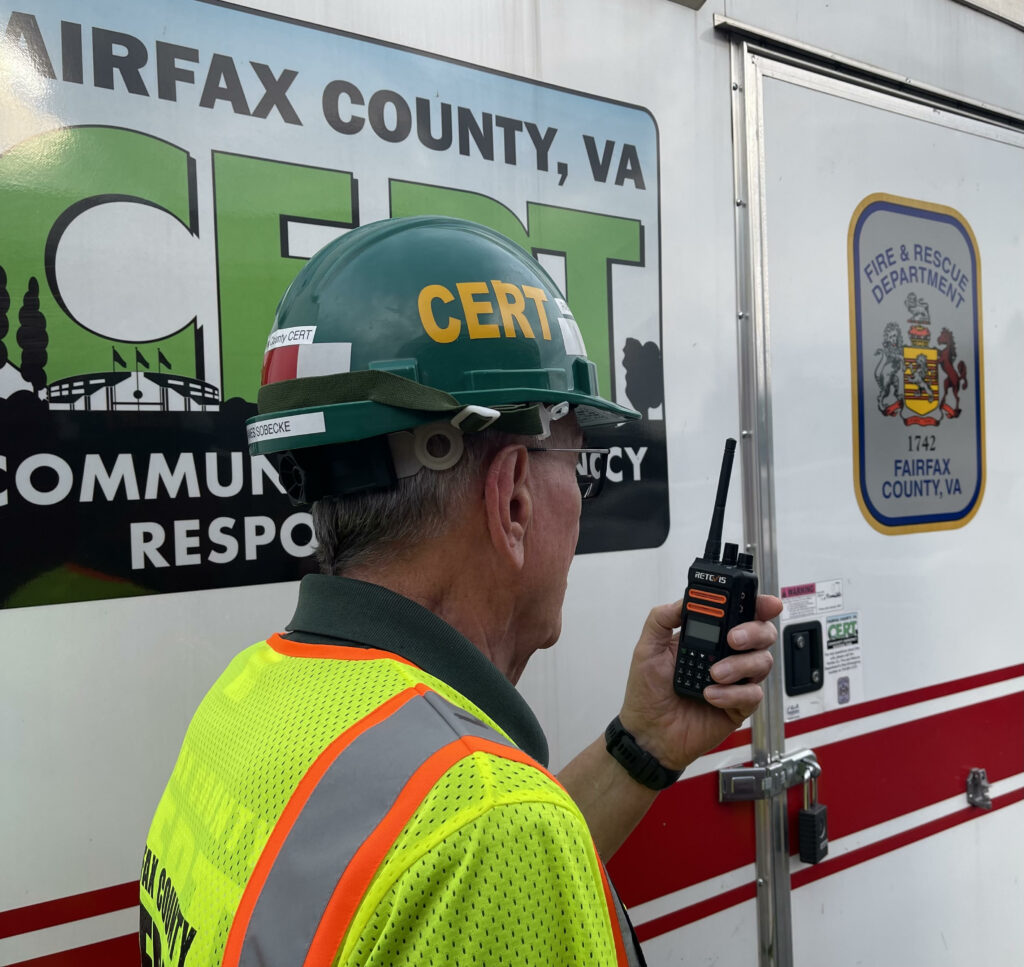
Organize a local radio drill with neighbors to stay prepared. Use the downtime to organize a small-scale emergency communication drill in your area:
Map out local repeaters, simplex frequencies, and backup channels. Practice relaying messages as you would in a real emergency. Encourage neighbors to get involved—GMRS licenses are easy to obtain!
4. Learn New Skills
Government websites and services might be limited, but your radio skills don’t have to be.
Study propagation patterns and antenna theory. Learn to program new repeaters or digital networks. Experiment with APRS (Automatic Packet Reporting System) for tracking and messaging.
5. Community Service
Use your radio to help others:
Check in on neighbors, especially those who are elderly or isolated. Provide updates on local events and community resources. Share knowledge about GMRS and HAM licensing to encourage responsible use.
6. Stay Informed
Even during a shutdown, staying informed is key:
Listen to weather alerts and emergency broadcasts on your radio. Track any local news updates through amateur networks. Keep your communication skills sharp by actively participating in nets and check-ins.
Affiliate Note: For the best radio gear during downtime, consider checking out Amazon’s HAM & GMRS radios and accessories. As an Amazon Associate, I earn from qualifying purchases at no extra cost to you.
Conclusion
A government shutdown doesn’t have to mean disconnection or inactivity. For HAM and GMRS enthusiasts, it’s a unique opportunity to hone skills, improve equipment, and support your local community. Whether you’re practicing emergency drills, learning digital modes, or just upgrading your setup, your radio can keep you connected no matter what’s happening in Washington.
-
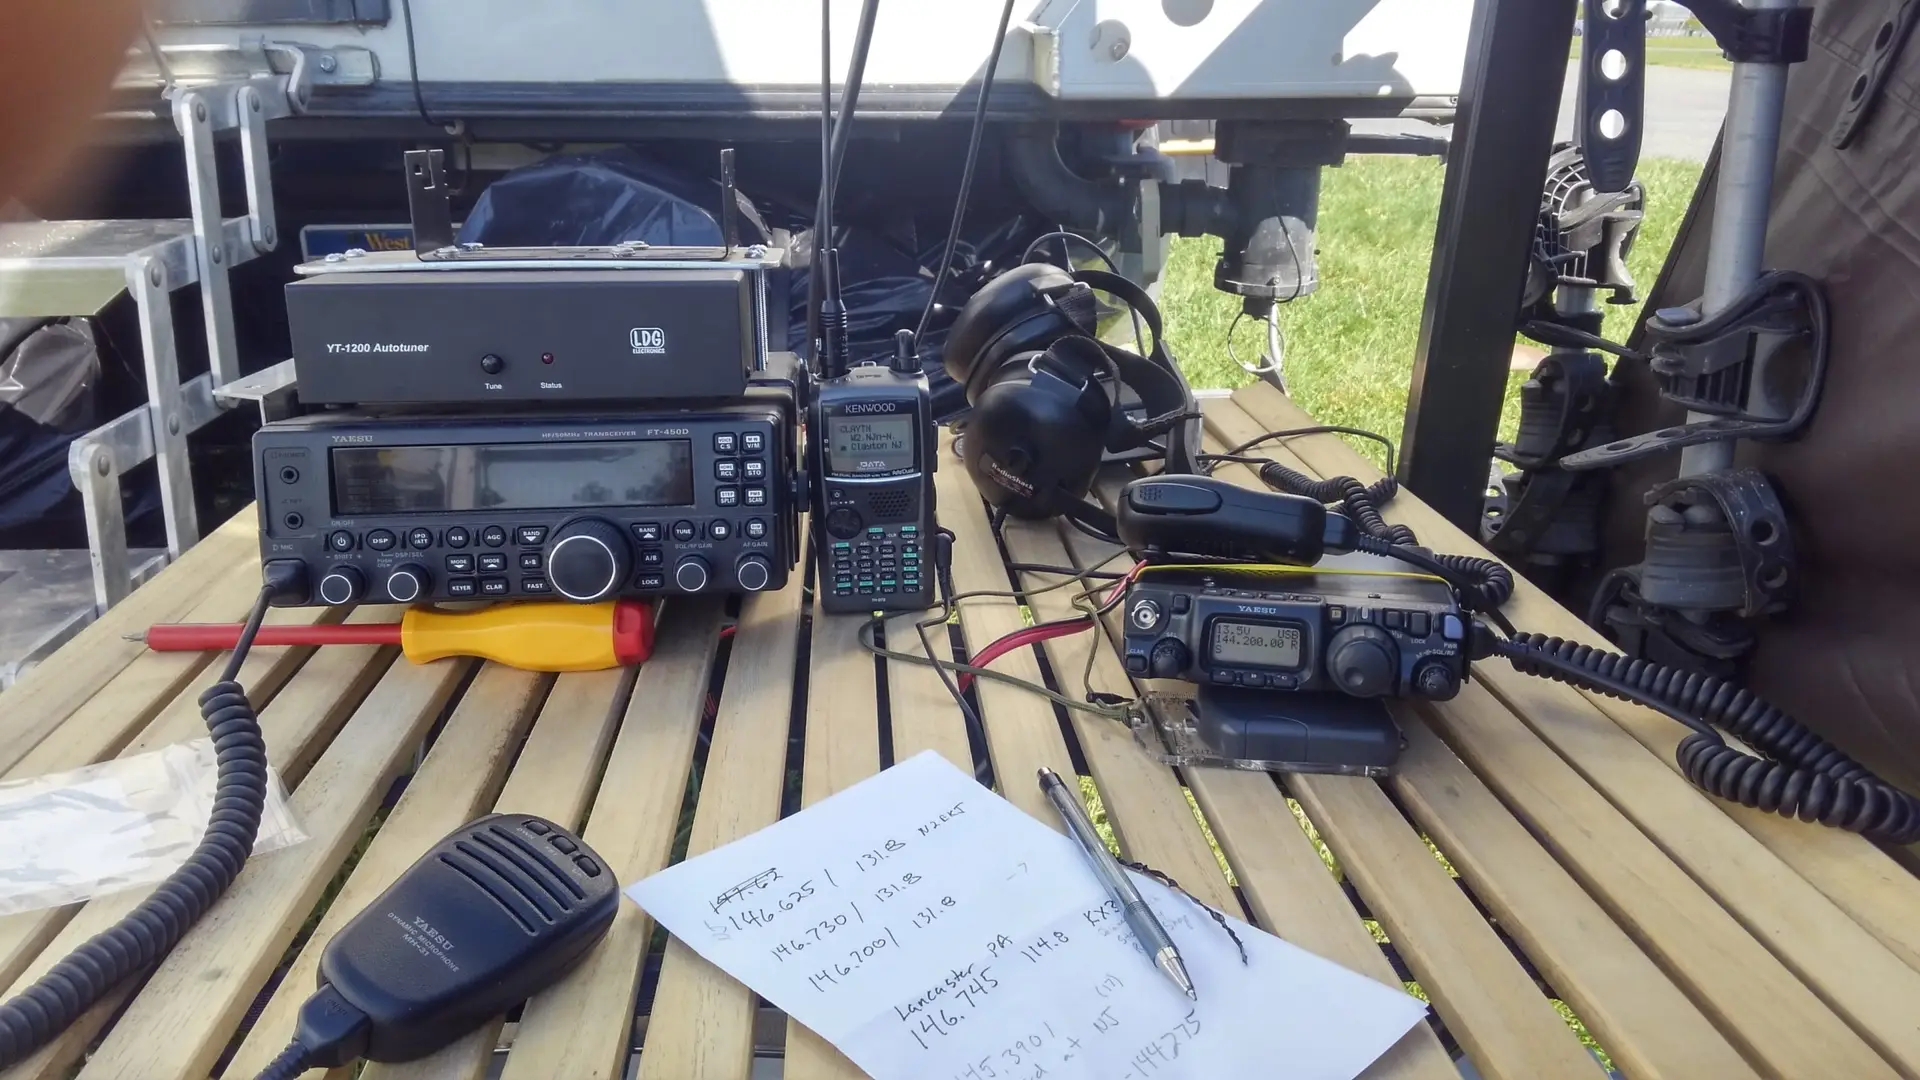
Essential Accessories for Your HAM and GMRS Radio Setup
10 Must-Have Accessories for HAM and GMRS Radios
Stepping into the world of HAM and GMRS radios unlocks incredible potential for communication, from casual chats with local friends to reaching across continents and providing critical support during emergencies. However, the experience delivered by your radio is only as good as the accessories that support it. A bare radio is a starting point, not a finished toolkit. To truly unlock performance, reliability, and convenience, you need to equip yourself with the right gear.
Here are the top 10 must-have HAM and GMRS radio accessories to build a robust and effective setup.
1. High-Performance Antennas
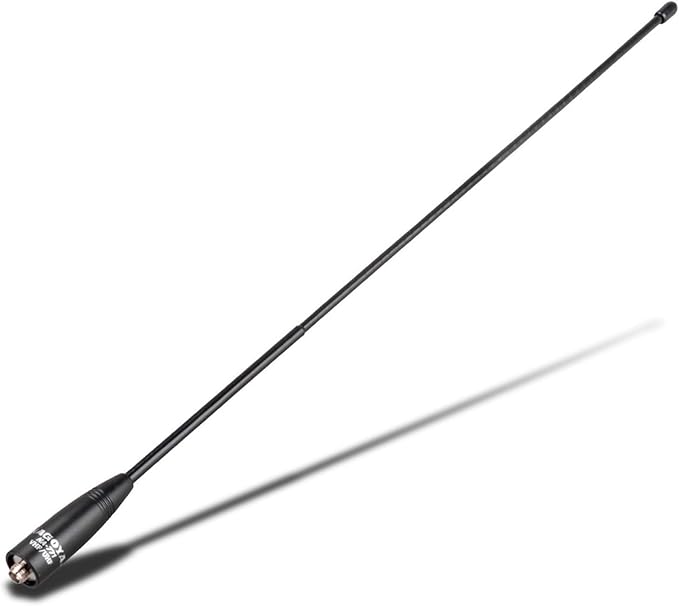
The single most impactful upgrade for any radio is its antenna. The small rubber “duck” antenna that comes with most handhelds is built for portability, not performance. Upgrading to a higher-gain aftermarket antenna can dramatically improve both transmit and receive capabilities.
👉 Recommended: Nagoya NA-771 Dual Band Antenna
2. Quality Coaxial Cable
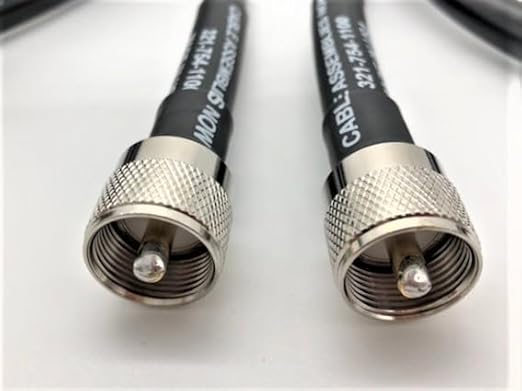
Even the best antenna is useless with poor-quality coax. Using low-loss coaxial cable like LMR-400 or RG-8X ensures maximum power transfer and minimal signal loss.
👉 Recommended: LMR-400 Coaxial Cable
3. Mobile Mounting Kits
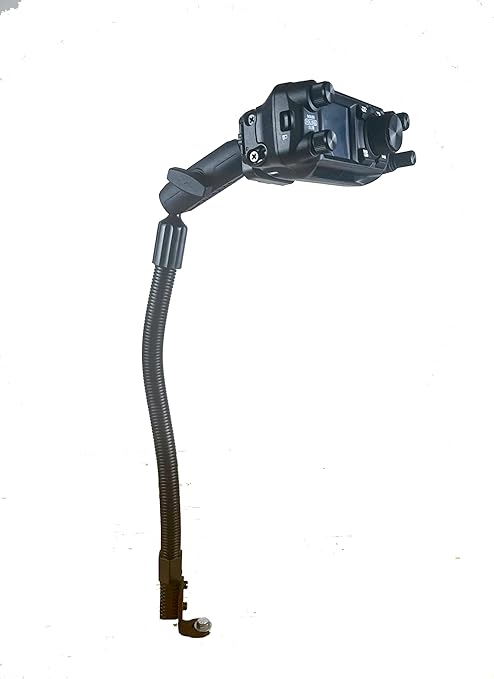
For GMRS and HAM mobile radios, a proper mounting kit keeps your setup stable and safe.
👉 Recommended: Lido LM-300 Universal Radio Mount
4. External Microphones and Speaker Mics
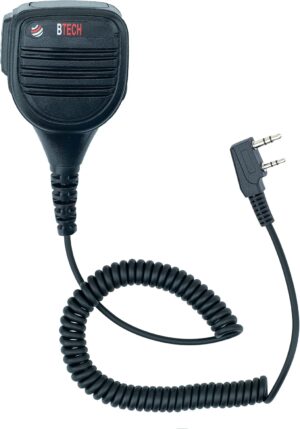
Using an external mic or speaker mic not only improves audio clarity but also adds convenience when operating on the go.
👉 Recommended: BTECH QHM22 Speaker Mic
5. Power Distribution Boxes
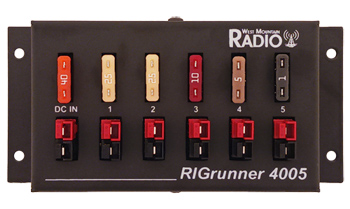
For mobile setups, a dedicated power distribution box wired directly to your vehicle’s battery ensures clean, stable power without draining a lighter socket.
👉 Recommended: RIGrunner 4005 Power Distribution
6. Portable Battery Packs

For off-grid and field operations, a LiFePO4 battery pack can run a 50-watt mobile unit for hours. Pair it with a solar panel for indefinite operation.
👉 Recommended: Bioenno LiFePO4 Battery Pack
7. Solar Charging Solutions
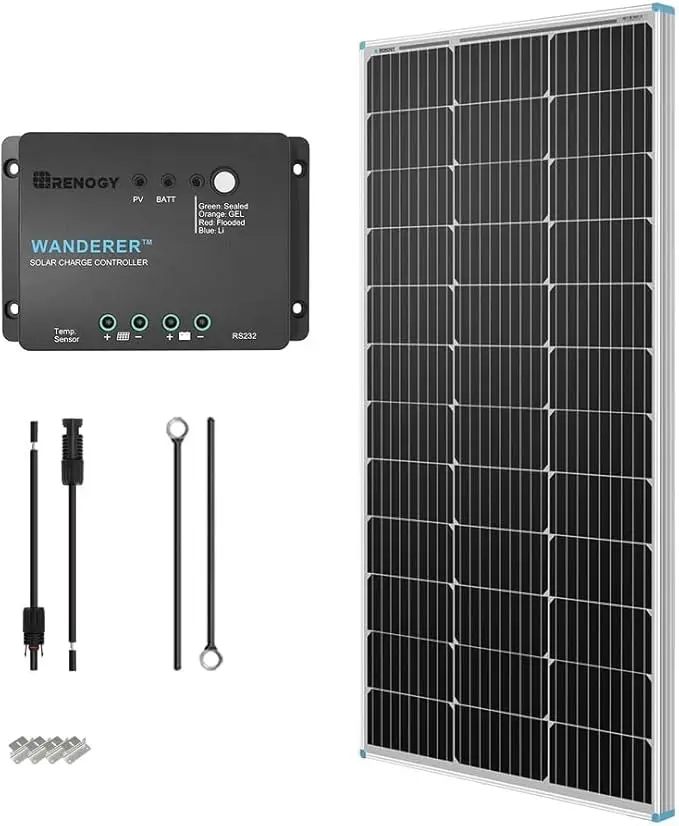
(Insert Image: folding solar panel charging radios outdoors)
A portable solar panel ensures your radios stay powered during emergencies or long outdoor trips.
👉 Recommended: Renogy 100W Solar Panel Kit
8. Noise-Cancelling Headsets
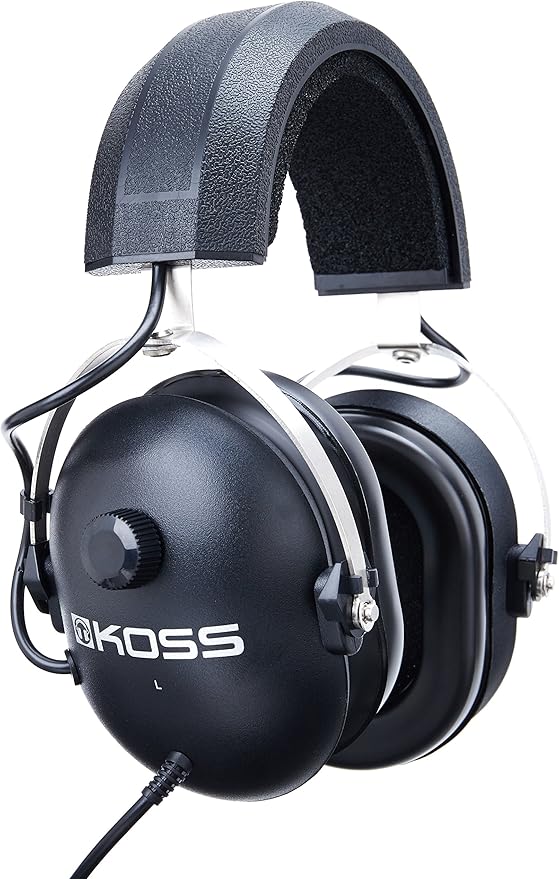
Clear communication is critical. A noise-cancelling headset cuts through background static and outdoor noise, making your transmissions crystal clear.
👉 Recommended: Koss Noise Reduction Headset
9. Protective Cases and Go-Bags
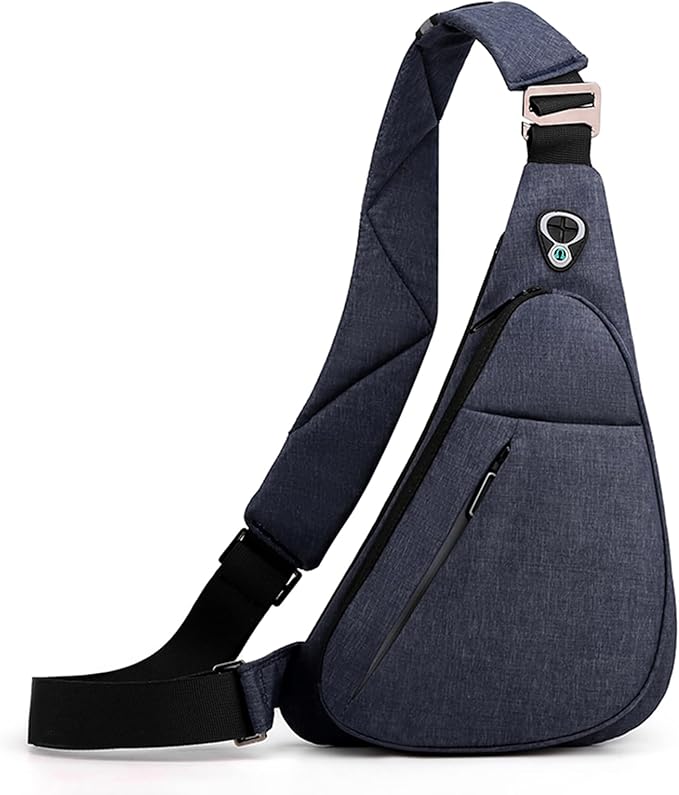
Whether you’re hiking with a GMRS radio or running a HAM emergency drill, a padded case or tactical go-bag protects your investment.
👉 Recommended: MAXTOP Tactical Sling Bag
10. Backup Power at Home
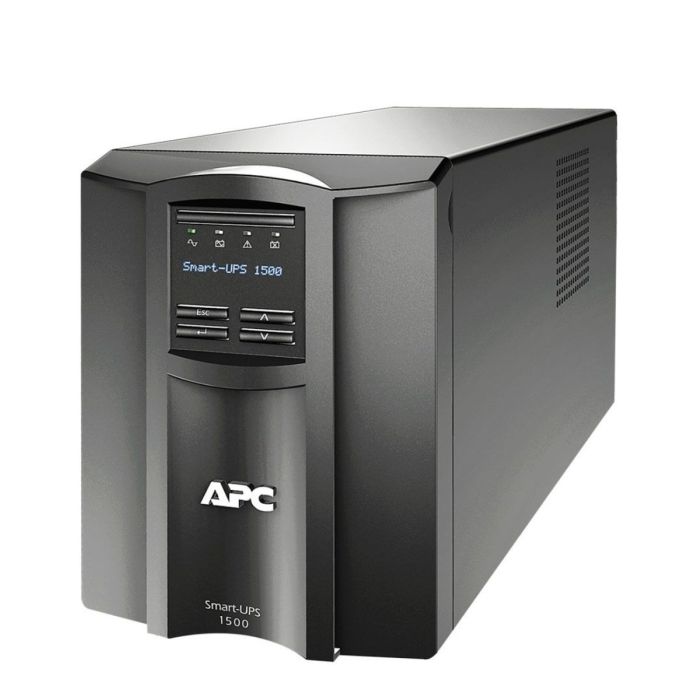
A reliable backup power system ensures your home station stays online during outages. Even a simple UPS or deep-cycle battery bank can keep you transmitting when the grid is down.
👉 Recommended: APC UPS Battery Backup
Final Thoughts
Building a capable and resilient radio station setup is a journey of incremental upgrades. By investing in the right accessories—from antennas to power solutions—you transform a simple radio into a powerful communication tool.
Whether you’re a HAM operator experimenting with new frequencies or a GMRS user ensuring your family stays connected, the right gear enhances your range, clarity, and reliability.
The goal is simple: not just to talk, but to be heard—clearly and consistently—no matter the circumstances.
Amazon Affiliate Disclosure
As an Amazon Associate, RadioOpBox.com earns from qualifying purchases. This does not affect the price you pay and helps support our mission to provide radio operators with valuable guides and resources.